XONE K3
Configuración Avanzada
CONTROLLER MODES
With the Xone K3 connected to USB, open VirtualDJ Settings -> OPTIONS tab ->Controller sub-category and select your preferred operation for your device.
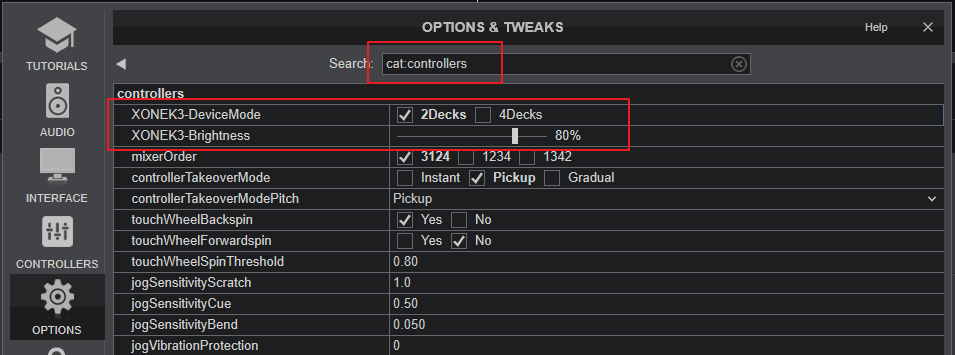
- XONEK3-DeviceMode : Select if your K3 will operate in 2-Decks or in 4-Decks mode.
- XONEK3-Brightness : Adjust the brightness level of the RGB leds of the Xone K3.
X:LINK
The Xone K3 is designed to connect with your computer via a USB-C port. More K3 devices can also be connected via a USB-hub if no spare USB ports are available.
The X-LINK connection at the rear side of the Xone K3 can be also used to connect and chain to other devices supporting X-LINK such as Allen & Heath Xone 23C, 43C and K2. However, the functionality of the K3 will then follow the one of Xone K2 (with single-color leds and slightly different actions and modes), so needs to be avoided.
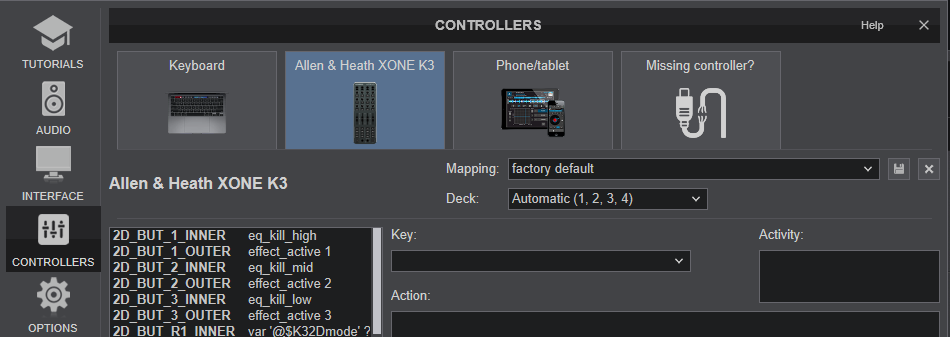
MIDI SETUP
The Xone K3 should be visible in the CONTROLLERS tab of VirtualDJ Settings and the “factory default” available/selected from the Mappings drop-down list.
The factory default Mapping offers the functions described in this Manual, however those can be adjusted to your needs via VDJ Script actions.
Find more details at https://www.virtualdj.com/wiki/VDJ8script.html
Note : There are 2 kind of MIDI keys offered in factory Mapping , named as 2D_ and 4D_ (stand for 2 Decks and 4 Decks modes as selected from the Controller settings above) If you need to assign a key with an action and keep this along both modes, you will need to assign the 2D_ and 4D_ keys as well.