Club Setup (CDJ+DJM)
Mixer Análogo
Description
"Analog Mixer" as a term is used here to describe audio mixers that don't offer a built-in sound interface.
In this setup you use the CDJ's both as control surfaces for VirtualDJ functions and as sound interfaces to playback audio.
This method can be used with ANY mixer, but has the most limitations.
This guide assumes that your setup consists of CDJ-2000NXS2 players, but the main principals are the same for all CDJ players.
This is the least preferred way to connect a setup that consists of CDJ players and a DJM mixer, and it should be used only if the mixer doesn't offer a sound interface.
Hardware setup
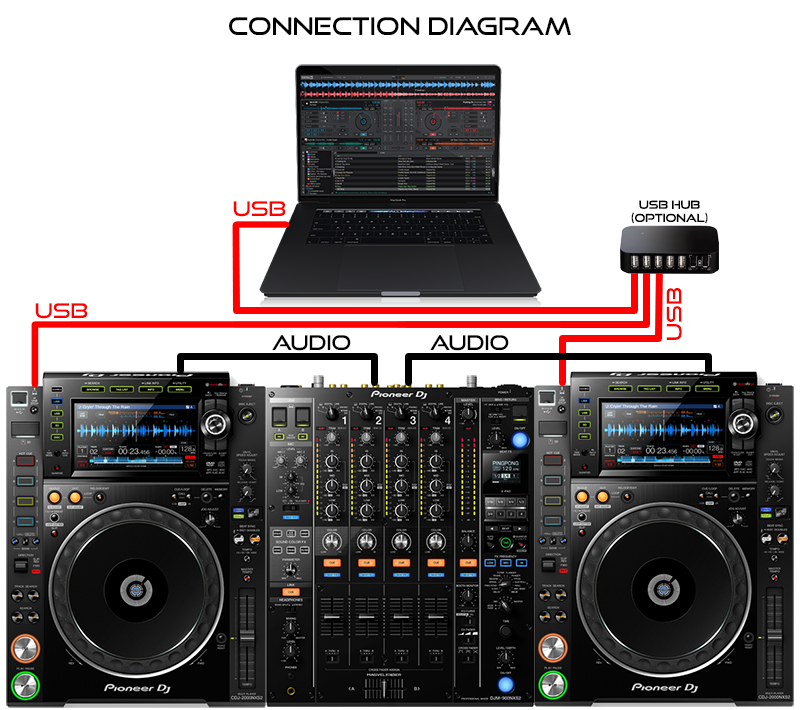
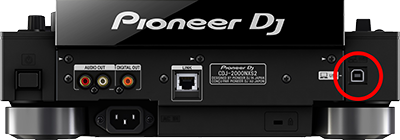
- Connect the "USB" port on the back of each CDJ with a USB hub, or a USB port on your computer.
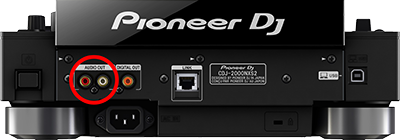
- Connect the "Audio Out" terminals on the rear of each CDJ with a "Line" input on the back of your mixer by using a pair of standard RCA cables.

- Power up CDJ's.
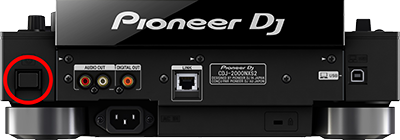
Drivers
For both Windows and Mac OS X computers install the latest firmware for your CDJ's from PioneerDJ.
Windows users: Install the latest Drivers for your CDJ's from PioneerDJ.
MAC OS X users: You don't need to install any Drivers , nor the Pioneer aggregation tool for CDJ's to operate correctly as sound interfaces with VirtualDJ.
VirtualDJ Setup
(in case you have not done already)
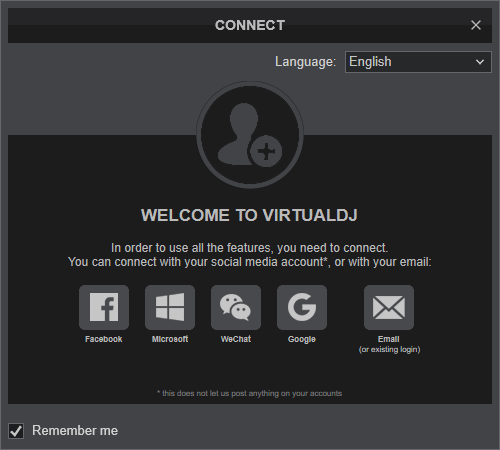
Once VirtualDJ is launched, a Login Window will appear. Please login with your preferred method from the ones provided.
A Pro Infinity or a Pro Subscription License is required to fully use this setup.
Without any of the above Licenses, the setup will operate for 10 minutes each time you restart VirtualDJ.
Buy a license
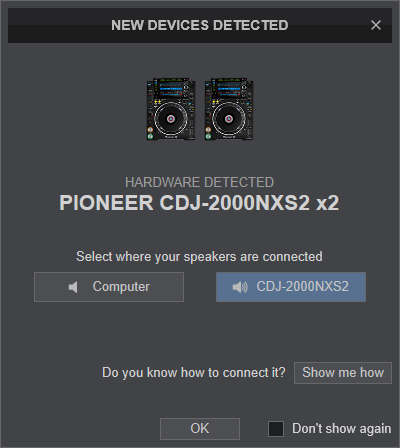
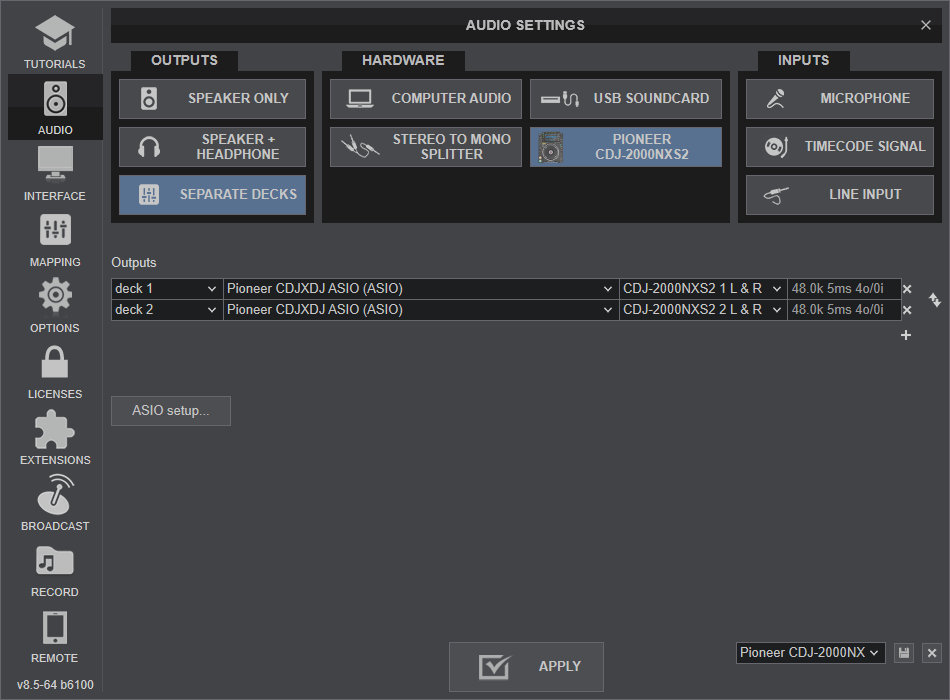
Click on the "CDJ-2000NXS2" (or your own CDJ's model) button for VirtualDJ to apply the predefined audio setup with the sound cards of CDJ-2000NXS2. You can still change that from Settings->AUDIO tab.
Click to OK.
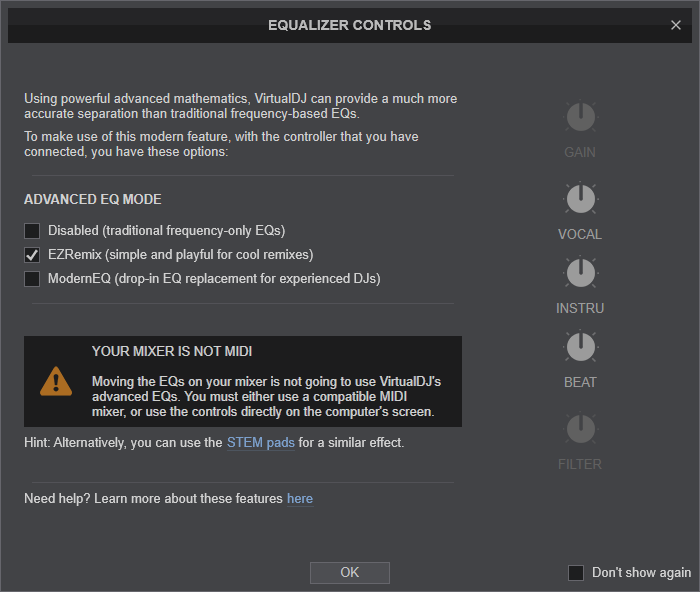
Select one of the desired operation modes for EQ.
Please note that since you are not using a MIDI capable mixer you won't be able to control Stems directly from your mixer.
Click to OK.
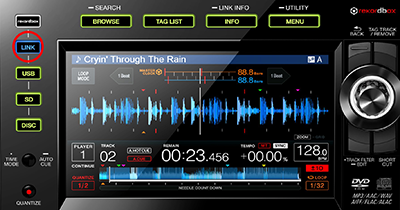
AUDIO Setup
CDJ-2000NXS2 (or your own CDJ's model) has a pre-defined Audio setup and a special button in the AUDIO tab of Config to provide that. Alternative Audio setups can be applied in the same window.
HID Setup
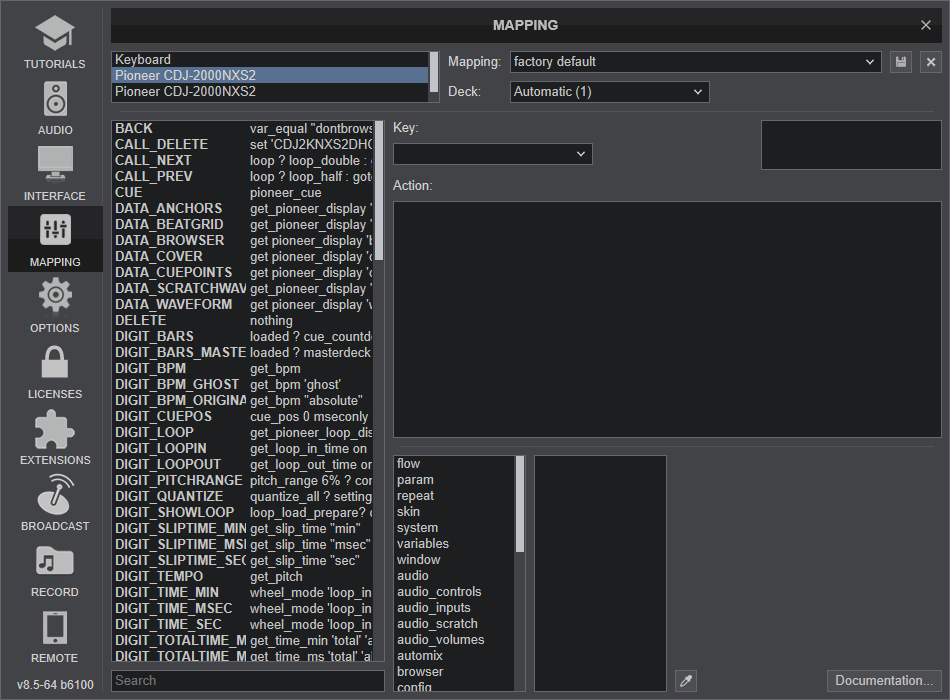
CDJ-2000NXS2 (or your own CDJ's model) should be visible in the CONTROLLERS tab of Config and the “factory default” should be available/selected from the Mappings drop-down list.
Deck Assignment
By default first CDJ (as listed by your OS) is assigned to first deck in VirtualDJ, second CDJ to second deck e.t.c.
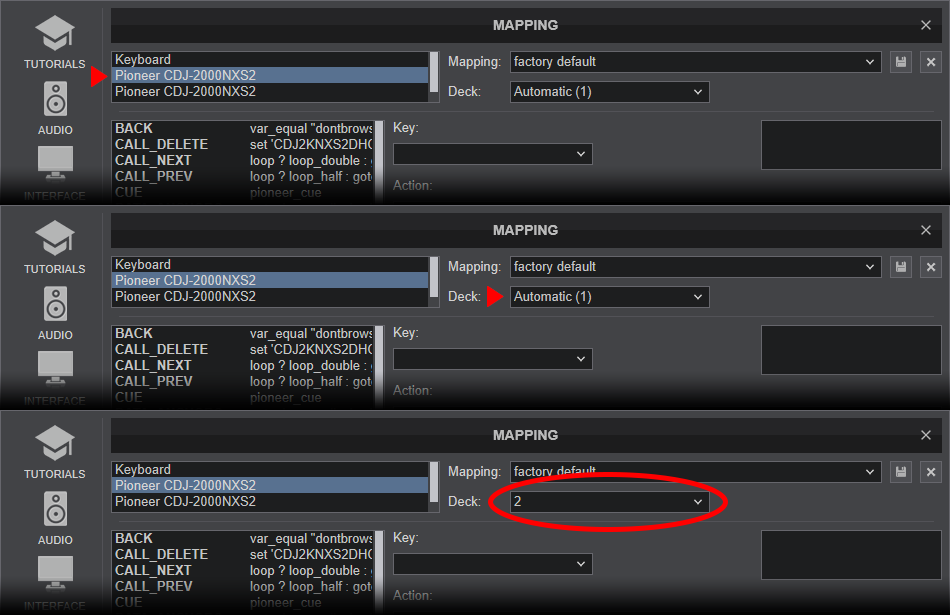
However if this order does not match the physical layout of your CDJ's you can change each CDJ's deck assignment as follows:
- Open VirtualDJ settings.
- Click on " Mapping " tab on the left.
- Select the first CDJ on the list.
- Click on "Deck" assignment drop down menu.
- Select the correct deck (e.g. 2) from the list.
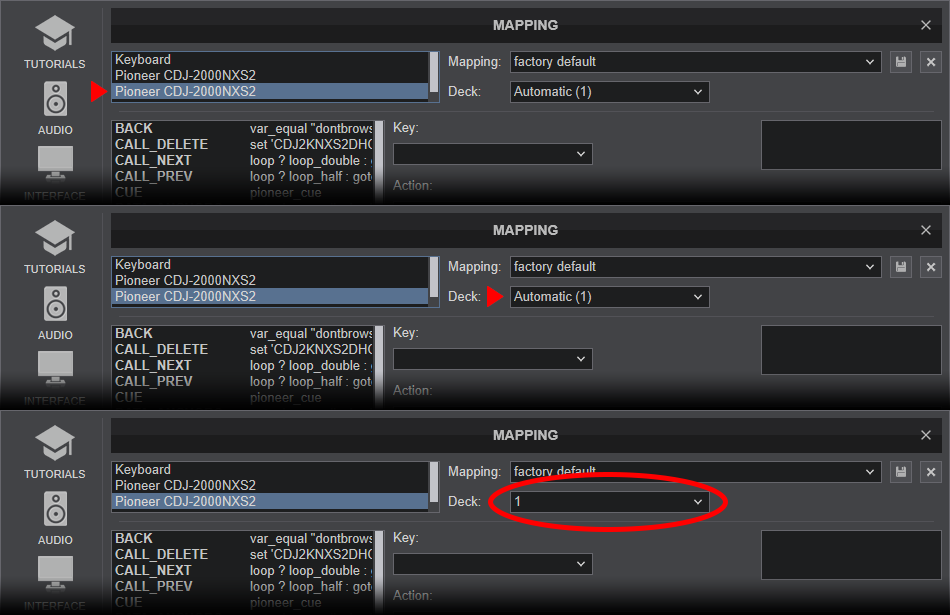
- Select the second CDJ on the list.
- Click on "Deck" assignment drop down menu.
- Select the correct deck (e.g. 1) from the list.
If the audio output of your CDJ's is inverted (left side CDJ plays the sound of right software side)
- Open VirtualDJ settings.
- Click on "Audio" tab on the left.
- Click on the "invert" icon next to audio assignments
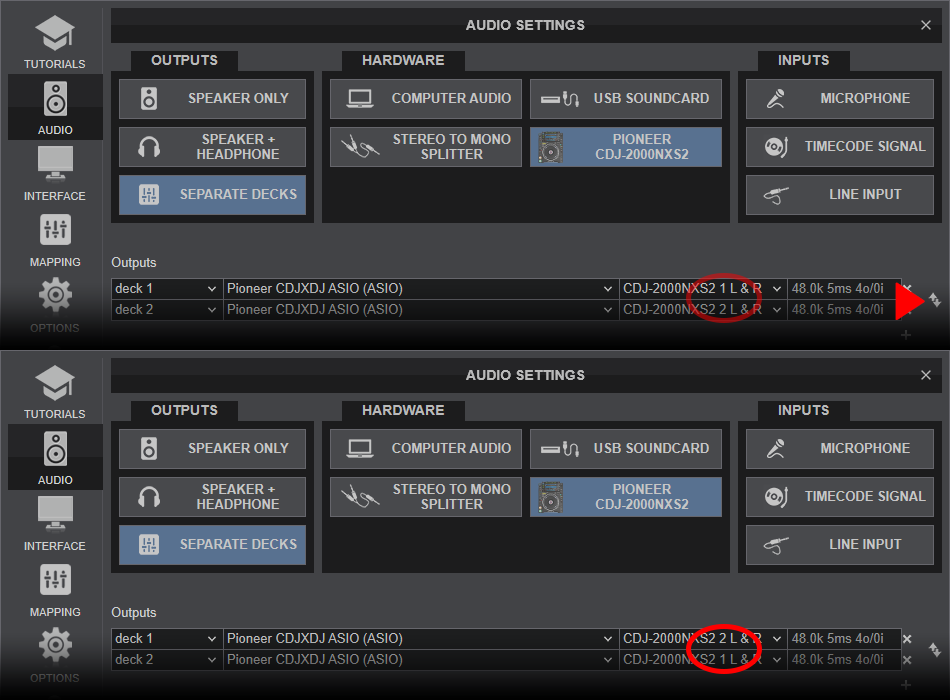
- Click on "Apply" button.


