


OS2L
Sunlite Suite 2 with OS2L
How to...
Below is a detailed Guide on how you can use VirtualDJ and Sunlite Suite 2 with OS2L:
Download and install Sunlite Suite 2 Beta from https://www.nicolaudie.com/download.htm
NEW Sunlite download website https://www.sunlitepro.com/download.htm

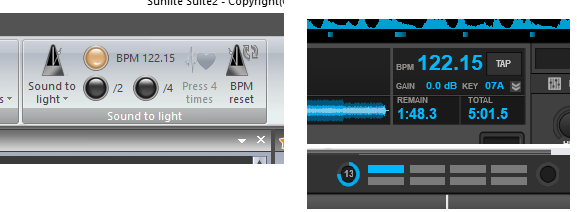
BPM/Phase Sync
From Sunlite Suite 2, click at the Sound to Light button at the top, to get the following window. Then select the "VirtualDJ Synchro" option

After that, the BPM of Sunlite (and its Phase) will follow the one from the Master Deck of VirtualDJ and scenes/steps will be triggered based on this tempo
Triggering Scenes
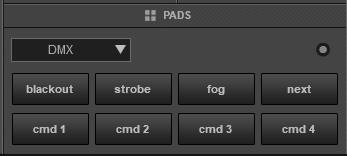
Once you creat some Scenes in Sunlite Suite, all you have to do is to use the VDJ action os2l_button "SceneName", where SceneName is the exact name that you have used in Sunlite for your scenes. You can use the default DMX Pad page and edit its Pads actions from the Pad Editor or of course assign the action to any Custom/Keyboard/Controller button.
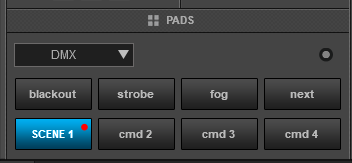
The following example assigns Pad 5 of the DMX Pads page to trigger a scene named as "Scene 1"
- Select the DMX Pads page from VirtualDJ GUI
and open the Pads Editor (Edit option at the top of the Pages list) - Select Pad 5 and then type os2l_button "Scene 1" in the action box. You can also change the name of the Pad to SCENE 1
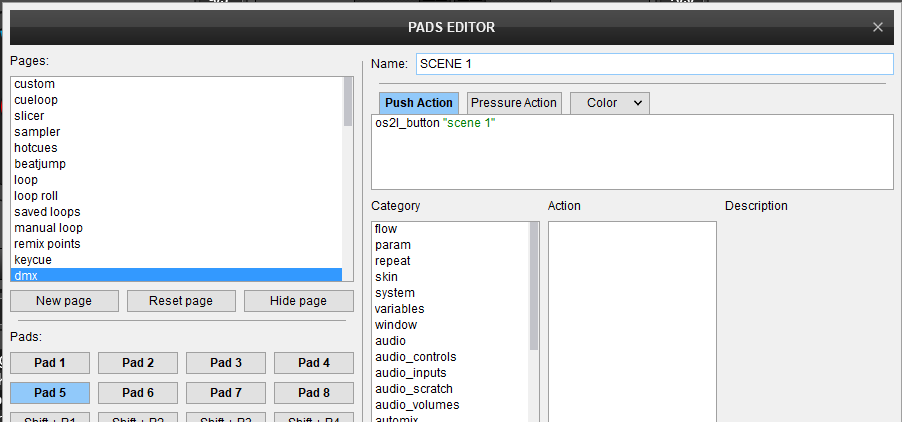
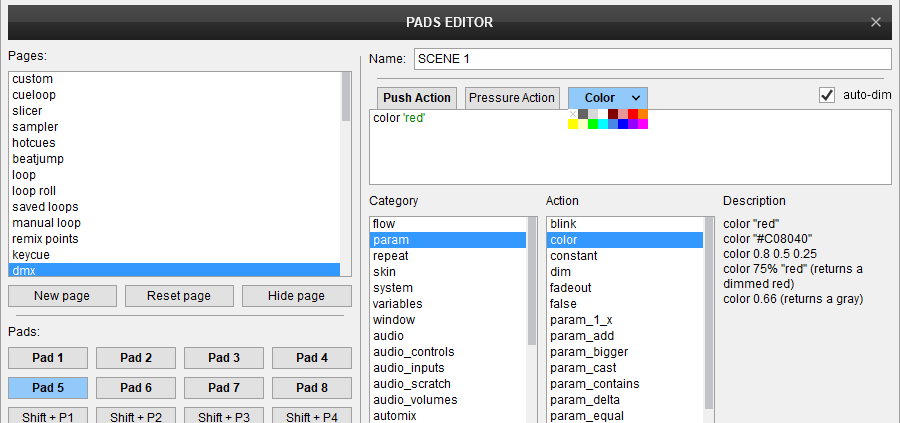
- Optionally, you can define a Color for your Pad, that will mostly help you with Controllers with RGB Pads .
- Close the Editor. You can now use Pad 5 to trigger Scene 1 in Sunlite. Note that if you trigger the Scene from Sunlite, the on/off status will be reflected to VirtualDJ as well.
Advanced Controls
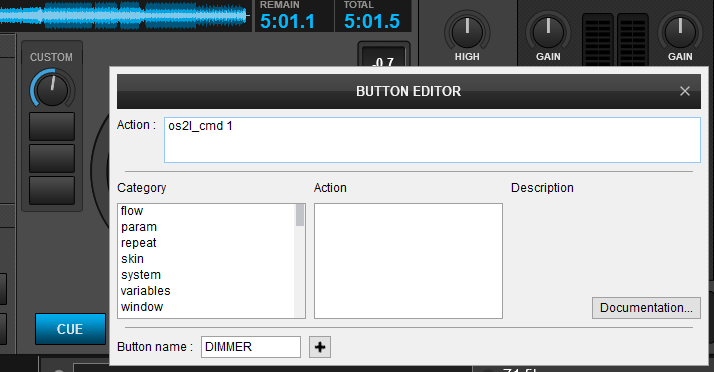
While the os2l_button action offers the ability to easily trigger scenes by their names, more advanced DMX actions can be performed using the os2l_cmd # action , where # is an ID number from 1 to 100 and can take a parameter as well (usually for faders), e.g. os2l_cmd 1 50% to set a fader in Sunlite assigned to VDJ ID 1 at 50%.
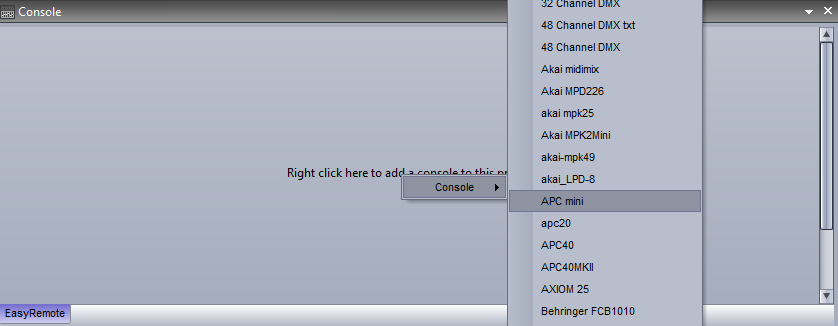
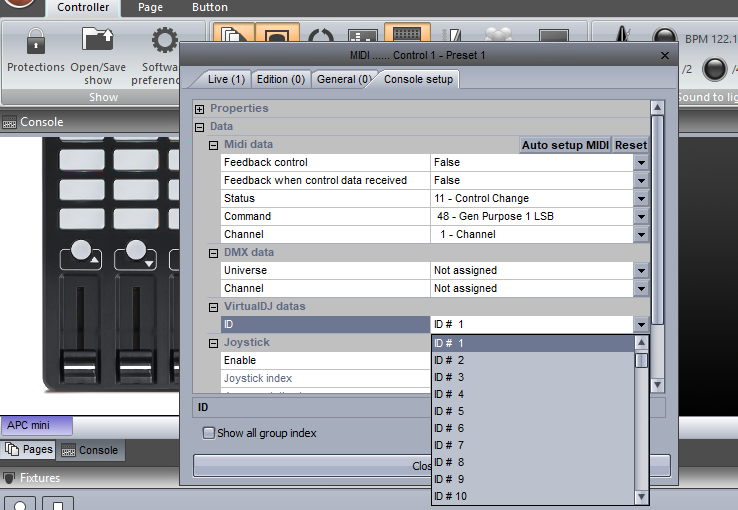
The IDs in Sunlite are assigned within the Console Window
- From Sunlite, click on the Console button at the top, to show the Console Window (if not already opened)

- Right-click and select a new Console from the available ones (you can create/modify a custom one as well). In this example we have selected the pre-installed AKAI APC Mini one
- When the selected Console appears, right-click on a button or fader. In this example we have right-clicked the 1st fader from the left.
In the 1st tab (Live) add and select a Sunlite Command. In this example, we have selected the General Dimmer command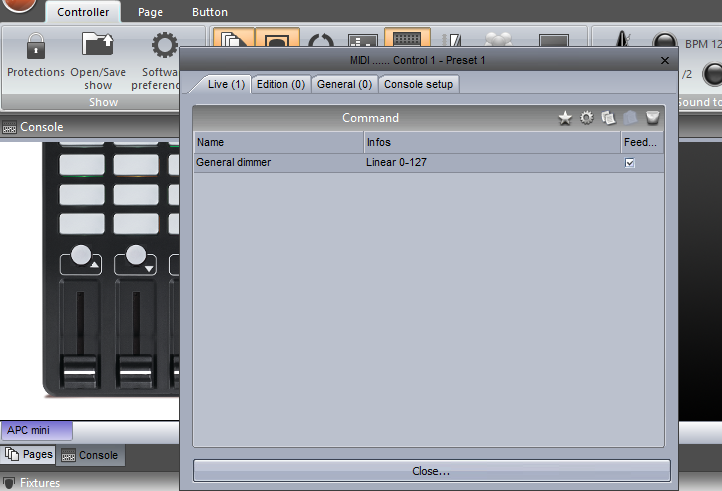
- Select the Console Setup tab and assign an ID to this control. In this example we have assigned ID 1 to the fader
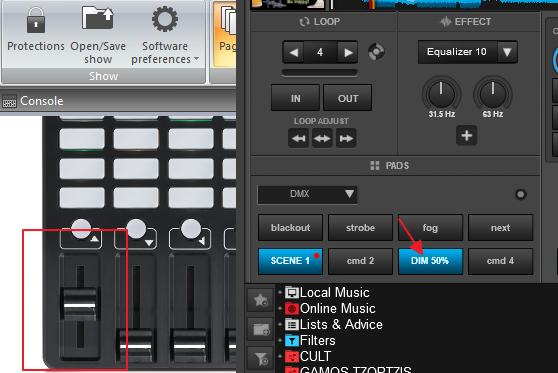
- From VirtualDJ, open the DMX Page in Editor and assign a Pad with os2l_cmd action. In this example, we assigned Pad 7 to dim lights to 50%, using the action os2l_cmd 1 50%

- Use Pad 7 each time you need to dim lights to 50%
- For fader controls, it makes sense to use knobs/sliders instead of buttons, and since the Pads page only offers buttons, you can use Custom knobs or knobs/faders on a Midi controller. In the following image, we have assigned a Skin Custom knob as os2l_cmd 1
Creating Light Shows per Track
Assuming that your DMX Software is compatible with OS2L protocol, you can create custom Light shows when a specific track is playing, using POI Editor and osl_ actions that will be triggered when a set POI in the track is reached.
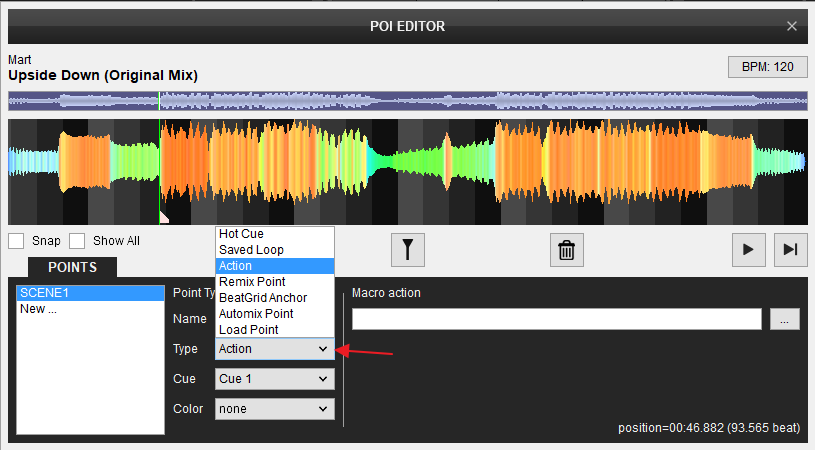
- Open a track from the VirtualDJ Browser with the POI Editor (right-click option)
- Select "New" from the left side window and then move the Cue Marker to the position you want a Scene to be triggered
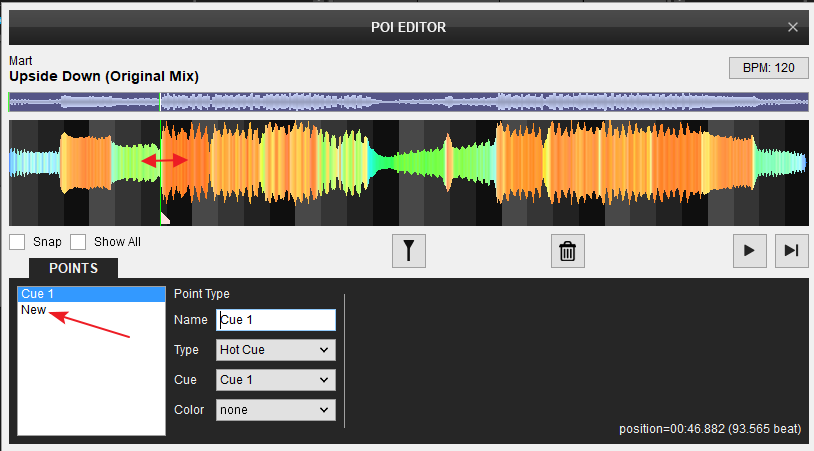
- Select the option "Action" from the Type drop-down list
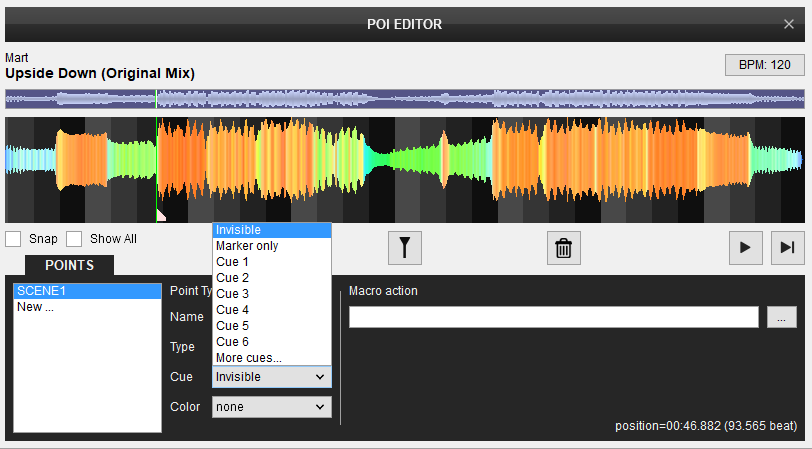
- Cue Option : Choose if the POI will be triggered with hotcue actions (Cue 1, 2 etc), if available as Cue Marker on the Wave or invisible.
- Type a os2l_ action in the Macro Action box. In this example, we used the action os2l_button "Scene 1" action so that the Scene 1 scene will be triggered when track reaches to this POI
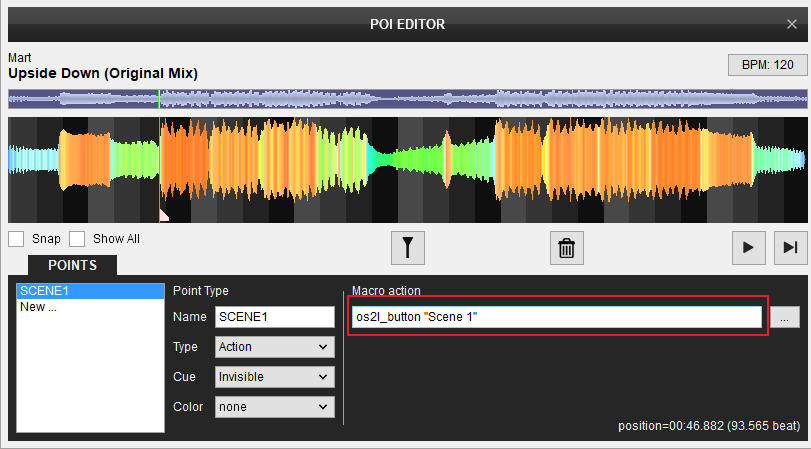
- Close the POI Editor. When the track is playing on a deck each time the track reaches the Action POI, the selected scene from the os2l_action will be triggered.
Notes:
- In case you need to add an os2l_ action to an existing Cue point, select the Cue X from the left side, set it to Action type, leave the Cue to Cue X and add your action to the Macro Action box.
- Multiple os2l_ actions can be chained in the same Macro Action box, to trigger multiple scenes at the same time and of course combine os2l_cmd and os2l_button actions, using the & character. e.g. os2l_button "Scene 1" & os2l_cmd 1 50%
- You can add as many Action type POIs as you like in the same track to create a more unique/complex Light show for the track.
- Action POIs (as all other POIs) data are saved in the VirtualDJ Database