


RP-8000MK2
Configuración
Connections
Normally the RP-8000MK2 will be used as a Digital Vinyl System (DVS) also known as Timecode mode. Up to 4 x RP-8000MK2 units may be linked (chained) as per the following diagrams. Connect one RP-8000MK2 with a USB port of your computer and use the provided USB/link cables to connect any additional unit as Slave units.
Use the provided RCA (or any standard RCA) cables to connect each RP-8000MK2 with the Line/Phono Inputs of your DVS Ready Audio Interface or Mixer.
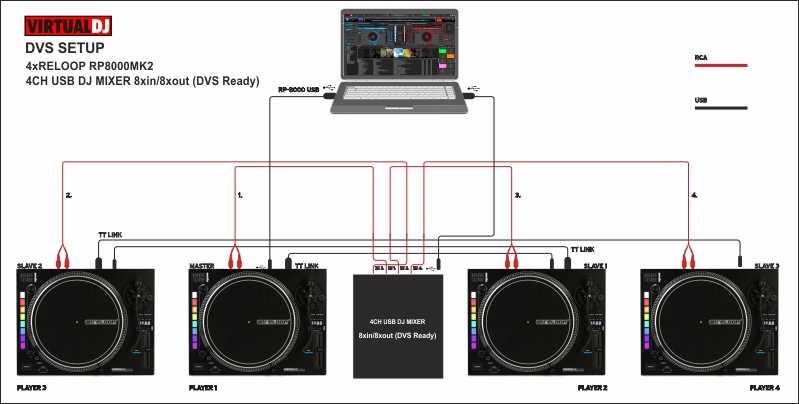
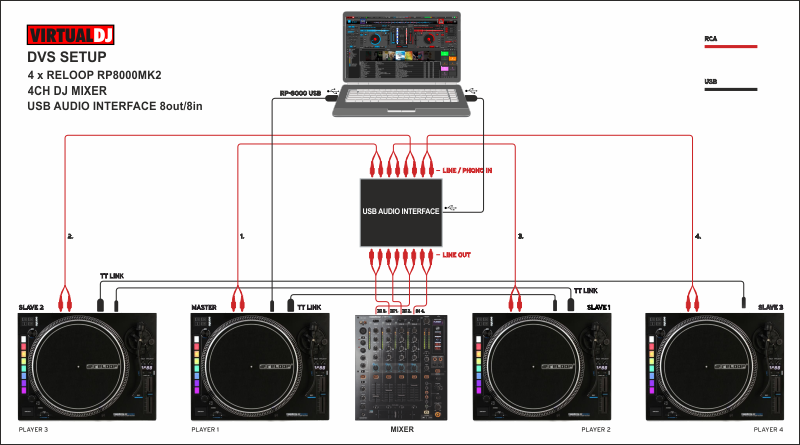
For each timecode Input (RP-8000MK2) a stereo input and a stereo output channel is required. E.g. for a 2xRP-8000MK2 setup a USB Audio Interface 4out/4in or a USB 2-channel mixer 4out/4in is required at least.
Connect the RP-8000MK2 units to AC using the provided cables and power on from the top On/Off switchers.
Firmware & Drivers
Firmware: Update the firmware of each unit to the latest version. Note that some of the features mentioned in this guide may not be available with outdated firmware. http://www.reloop.com/reloop-rp-8000mk2
Drivers : No Driver software is required for the Reloop RP-8000MK2 to be installed. The device is USB class compliant and your Operating System will auto-install the necessary Driver when connected via USB cable or linked as Slave unit.
VirtualDJ Setup
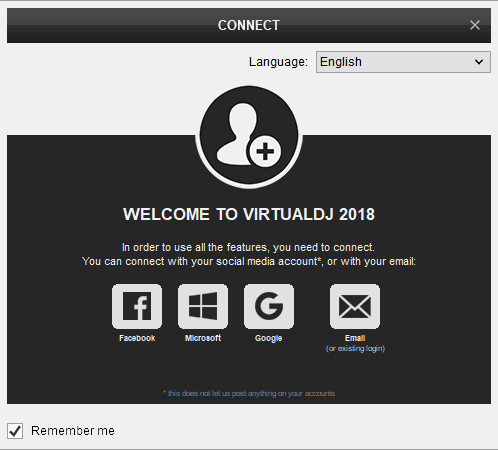
Once VirtualDJ 8 is launched, a Login Window will appear. Login with your virtualdj.com account.
A Pro Infinity, a Plus or a Pro Subscription License is required to use the Reloop RP-8000MK2 as MIDI controller.
For Timecode (DVS) use, an additional Timecode Plus license (in combination with a RP-8000MK2 Plus license) or Pro Infinity license is required.
Without any of the above Licenses, the controller will operate for 10 minutes each time you restart VirtualDJ.
https://virtualdj.com/buy/
Click to OK.
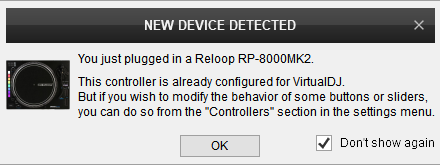
Unit is now to ready to operate with VirtualDJ.
Audio Setup
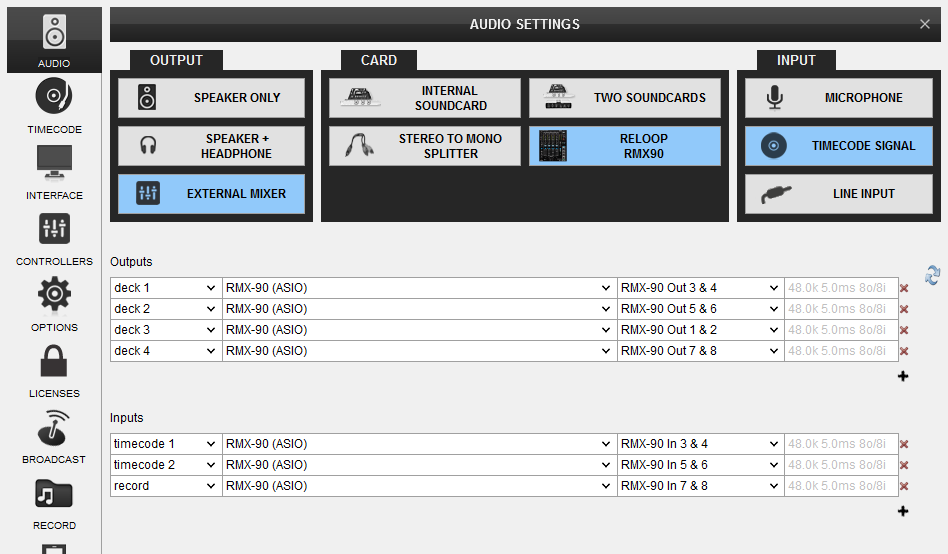
The RP-8000MK2 is not offering any pre-defined audio configuration, as no built-in audio interface is available. Depending on the used USB DVS-ready sound card or DVS-ready mixer, manually create the necessary audio configuration (in case those don’t offer a pre-defined Timecode configuration).
The following image is showing the pre-defined audio configuration when a Reloop RMX-90 mixer is used (DVS-ready) with 2 Timecode Inputs.
MIDI Operation
The unit should be visible in the CONTROLLERS tab of Config and the “factory default” available/selected from the Mappings drop-down list. The factory default Mapping offers the functions described in this Manual, however those can be adjusted to your needs via VDJ Script actions. Find more details at https://virtualdj.com/wiki/VDJ8script.html

Note that each unit offers 4 Hardware Layers and will be assigned to Decks 1,2,3,4 by default. The hardware layer (which VirtualDJ deck the unit will control) can be set by the following ways.
1. After each power-cycle of the RP-8000MK2, the top 4 Pads (lit in green) represent a hardware layer. By default the unit will be assigned to Deck 1 (led of the top Pad will be flashing green). Select one of the 4 Pads to assign each unit to the desired VirtualDJ deck.
2. Hold the BROWSE encoder for more than 3 seconds, until the 4 green Pads appear and the LCD indicate CH-1 or other number. Press a it pad to make your selection. If no selection is made within the next 10 seconds, the unit will be automatically assigned to the currently/default hardware layer.
For further software settings please refer to the User Guides of VirtualDJ 8.
https://virtualdj.com/manuals/virtualdj.html