Master OUT 1 (XLR): Connect this low-impedance XLR output to a PA system or powered monitors. The level of this output is controlled with the Master knob on the top panel.
Master OUT 2 (RCA): Use standard RCA cables to connect this output to a speaker or amplifier system. The level of this output is controlled by the Master knob on the top panel.
BOOTH OUT (RCA): Use standard RCA cables to connect this output to a booth monitoring system. The level of this output is controlled by the Booth knob on the top panel.
MIC INPUT. Connect a 1/4" microphone to this input. This input's audio signal is routed directly to the Master Output of the XDJ-R1 and its level is controlled by the MIC LEVEL knob at the top panel.
AUX IN. Connect an external audio source to this Input and control its Input level by the AUX LEVEL knob at the top panel.
PHONO/LINE INPUTS. Connect your audio sources (CD Players, turntables etc) to these inputs. Inputs 1 and 2 can accept both line and phono-level signals.
USB. This USB connection sends and receives audio and control information from a connected computer.
AC POWER: Use the included power cable to connect the XDJ-R1 to a power outlet. The unit is powered on/off by the button at the top panel.
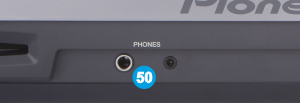
PHONES SOCKET. Connect your 1/4" or 1/8" headphones to this output for cueing and mix monitoring.