- Guía Rápida
- Carátula
- Sección Superior
- Decks
- Mixer
- Navegador
- Base de Datos
- Separación de Pistas (Stems) 2.0
- Editores
- Configuración
- Control Remoto de VirtualDJ
- Apendice


Manual del Usuario
Censura en Tracks
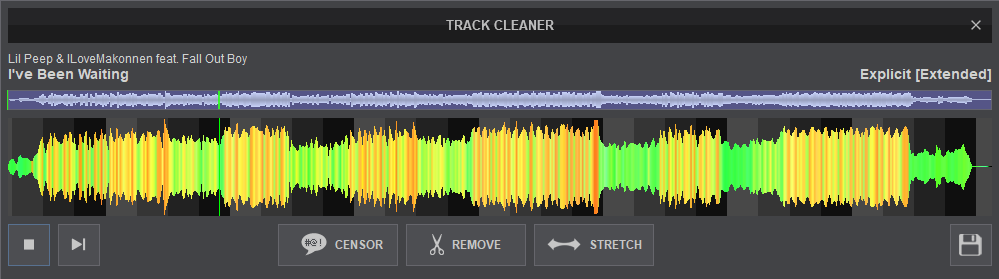
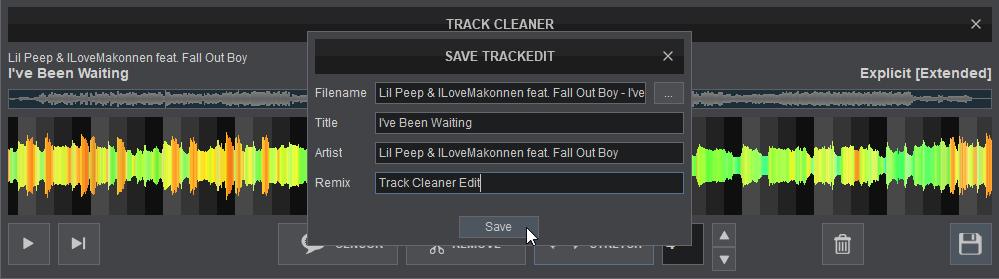
The Track Cleaner is a useful tool that will allow you to remove, censor or stretch (repeat) parts of your tracks. The process is non-destructive (does not alter the original file) and creates a special .vdjedit file that can be loaded to a deck and used in place of the un-edited original file.
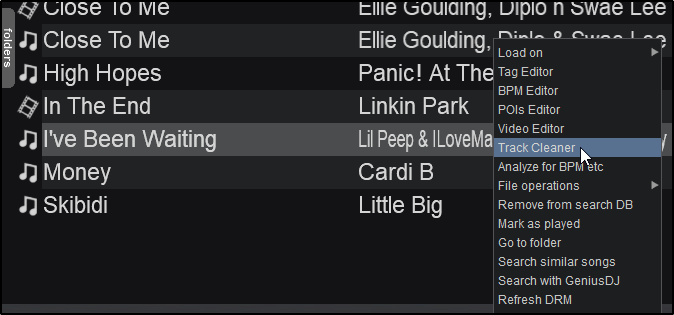
The track will only be audible through the PFL if a headphone channel has been created in the Audio Setup (if no headphone channel is available a pop up window will display asking if the feature can be used through the Master output). Right-click on any of your tracks in the File List to open the Track Cleaner.

- FILE INFO. This area shows the Artist, Title and Remix (if entered) of the file being edited.
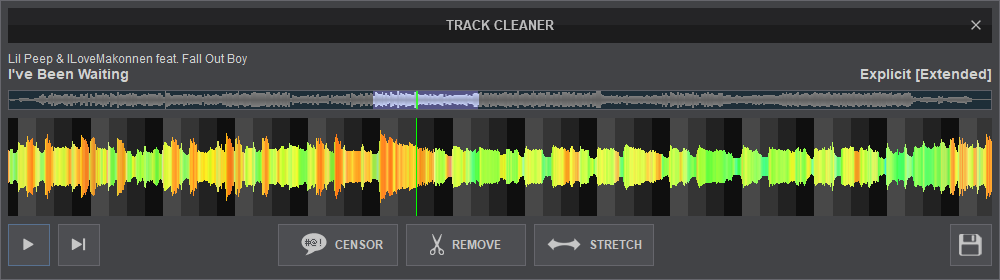
- SCROLL BAR. Displays the zoom level of the waveform and can be dragged to any part of the track to perform precise edits.
- WAVEFORM. Provides a visual display of the audio information. It displays the beatgrid using the grayscaled background and can be zoomed in to make precise edits with a wheel mouse.
- PLAYHEAD. Shows the current position of the track. All edits and play functions use the playhead to determine the start position. It can be clicked and dragged to any part of the track with a mouse.
- PLAY/STOP. Will play the track if it is stopped and will stop the track if it’s playing.
- PLAY-HOLD. Plays the track as long as the button is held. Once released, the playhead will jump back to it’s previously stopped position.
- SNAP. When checked, will snap the edited track to the nearest beat.
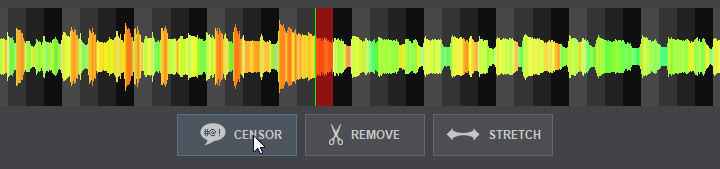
- CENSOR. Plays a section of the track backwards or with muted vocals (censored). Censored areas are marked in Red and will show the censor type as well as the number of beats the censor is applied.
- CENSOR TYPE. Determines how a censor edit is played back. Reverse will play the entire section of the track backwards briefly, while Mute Vocal will only remove the vocal Stem as the track continues to play normally.
- REMOVE. Removes an entire section of the track and will jump forward to the next playable position. Removed areas are marked in Yellow and will display the number of beats that are cut from the track.
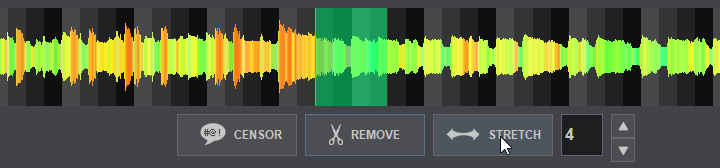
- STRETCH. Repeats a section of the track. Stretched areas are marked in Green and will display the number of beats that the track is stretched for. Use the repeat field to indicate the number of times the stretch repeats ( Loops ).
- REPEAT. An editable field with a number will be displayed if a Stretch edit is created. Use the up and down arrows to increase/decrease the number of times ( Loops ) a Stretch repeats.
- DELETE. Deletes the selected (highlighted) edit.
- SAVE. Creates a .vdjedit file in the same folder as your original track and a special icon will be applied to this file (see File Icons)
- SAVE/EXPORT. Provides the option to save as a .vdjedit file or export as a new file.
How to
- From the File list, right-click on the file you wish to edit and select Track Cleaner from the option menu that appears.
- Press the Play Button to get the Playhead moving and prelisten to your track.
- Stop the track and zoom into the waveform with a wheel mouse to isolate a specific area for editing. Move the Playhead to the starting point of the area to be edited.
- Pick the type of edit to use and click on that button to insert the edit into the track. By default the Censor is set to 1 beat while Remove and Stretch are set to 4 beats.

- Grab either edge of the edit with your mouse to increase or decrease the size to override the default values and make a precise edit to that section of the track.

- Delete unwanted edits by clicking on the selection and using the Delete button.
- Prelisten to the track to confirm the edits and click on Save to save the completed edited track. A pop-up will appear asking to name the edited track. Give your edit a name and click on Save.
- The saved edit will be stored in the same folder as the original track and will have a modified icon (see File Icons) along with the new name. The original track can be played unaltered in its entirety or you can use the edited file created depending on what the situation calls for.
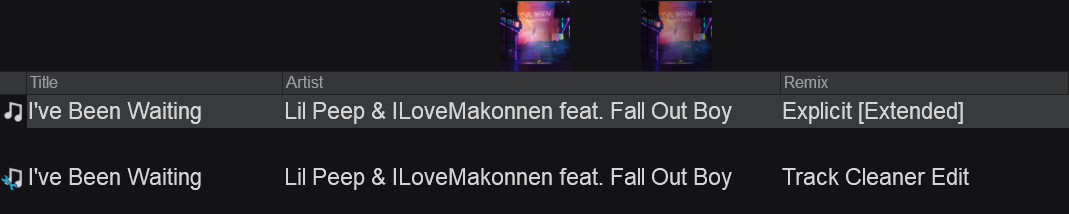
Multiple vdjedit files can be created from the original file or can be edited using the Track Cleaner as many times as required. They are automatically added to the Search Database.
Multiple Censor, Remove and Stretch marked areas can be applied on the same track but cannot be overlapped. Move the Playhead to a different position if you wish to move any of the marked areas over another.