- Guía Rápida
- Carátula
- Sección Superior
- Decks
- Mixer
- Navegador
- Base de Datos
- Separación de Pistas (Stems) 2.0
- Editores
- Configuración
- Control Remoto de VirtualDJ
- Apendice


Manual del Usuario
Editor de Video
The Video Editor provides the ability to overlay video files and text over an existing Audio or Video track and is available as a Right-click option to any track in the File list. The process is non-destructive (does not alter the original file) and creates a special .vdjedit file that can be loaded to a deck and used in place of the un-edited original file.
The track will only be audible through the PFL if a headphone channel has been created in the Audio Setup (if no headphone channel is available a pop up window will display asking if the feature can be used through the Master output).
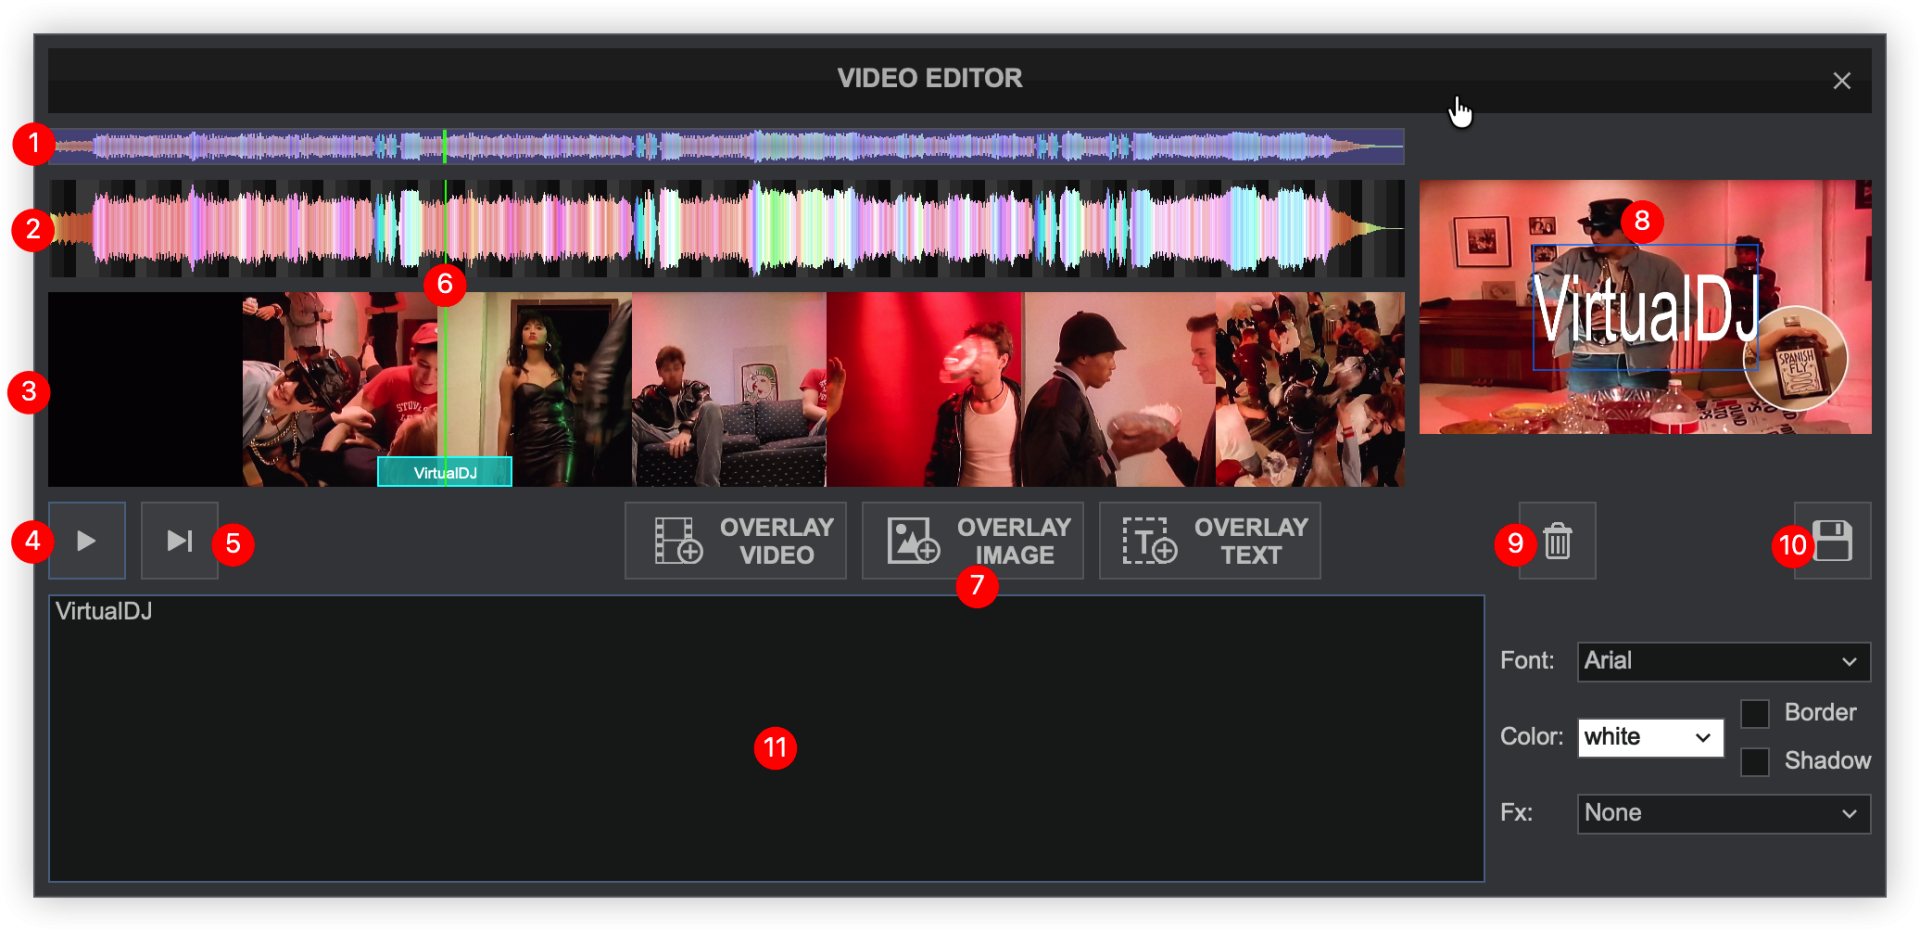
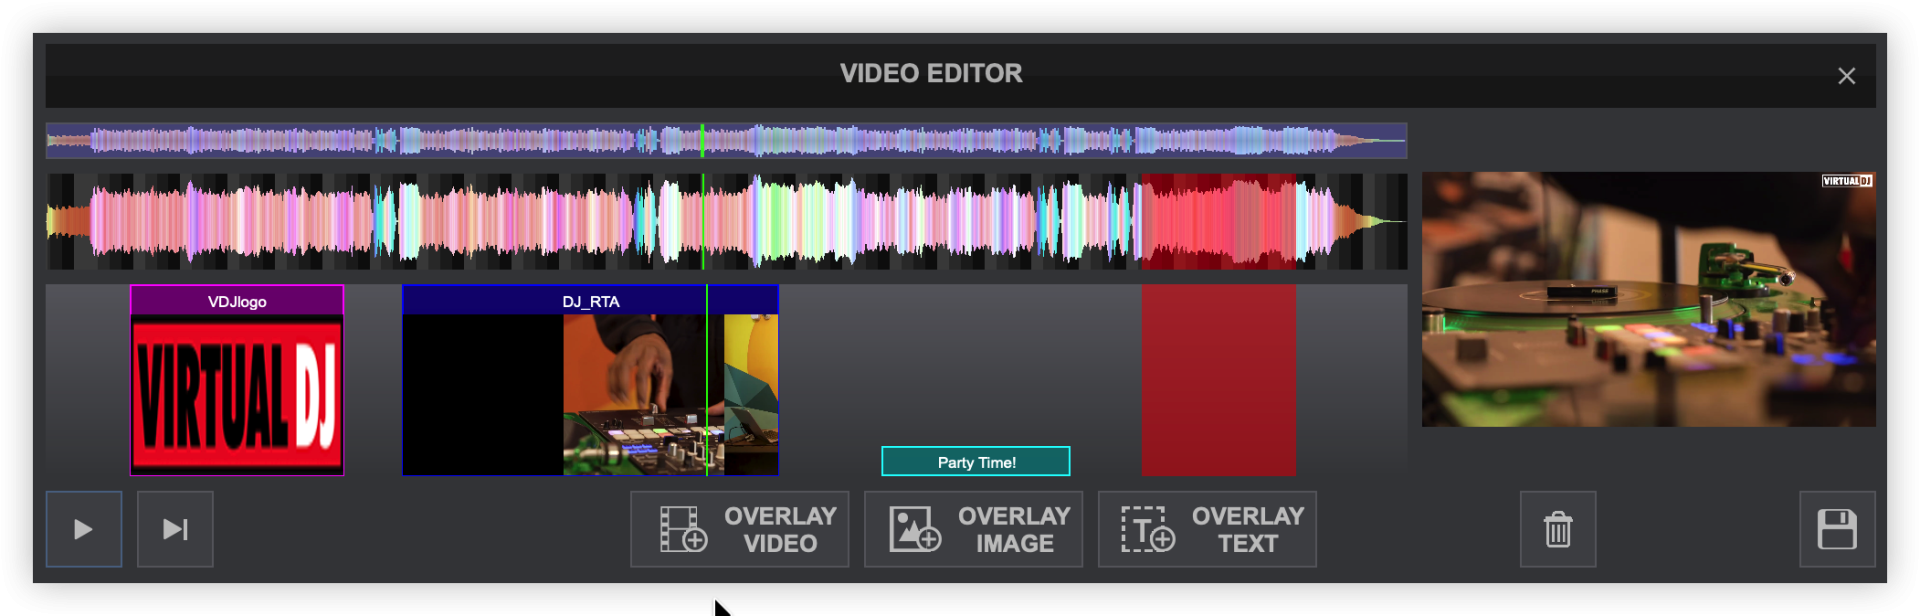
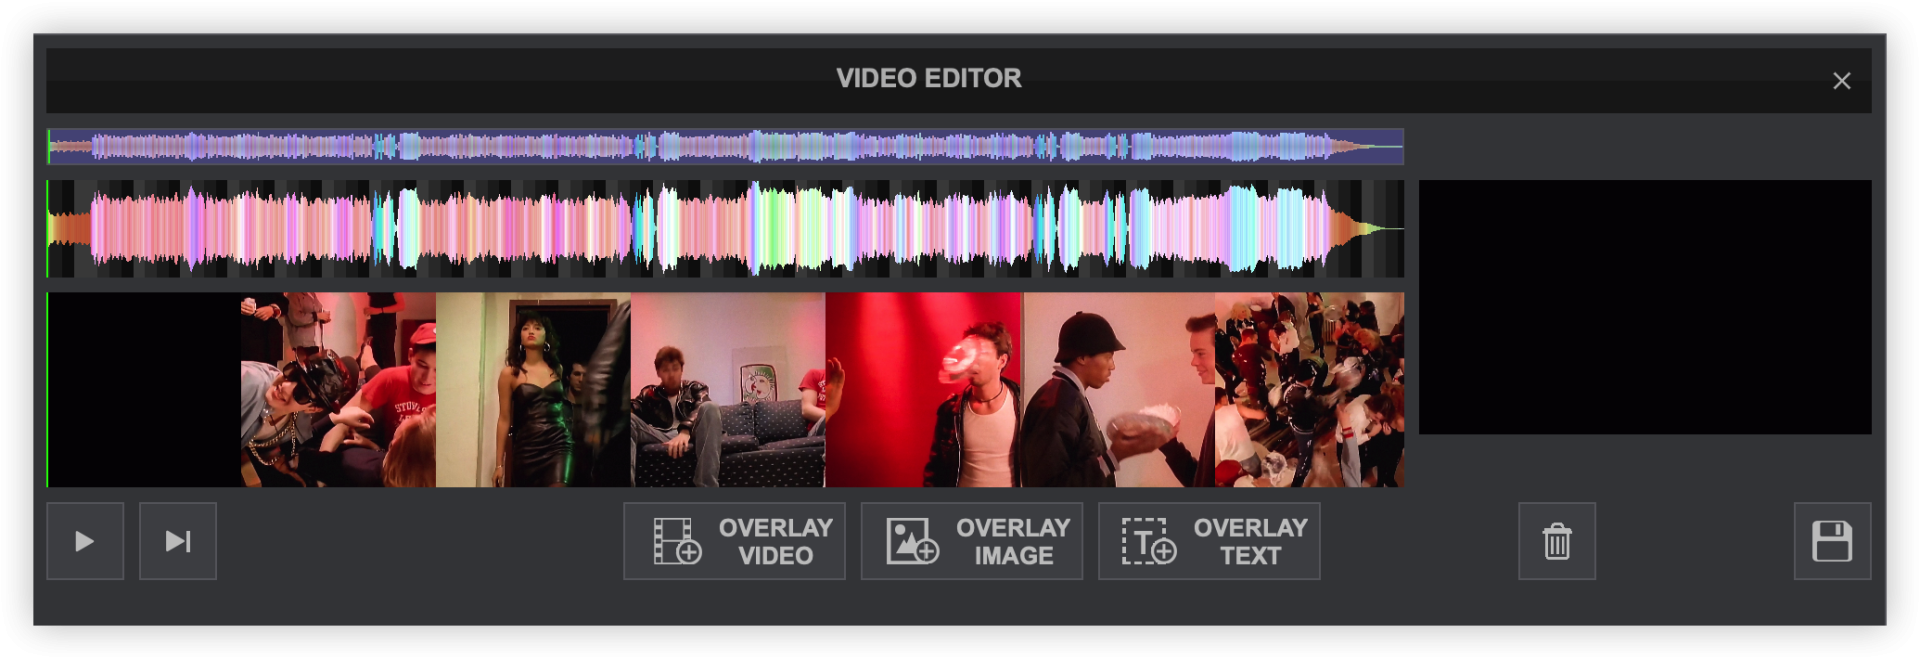
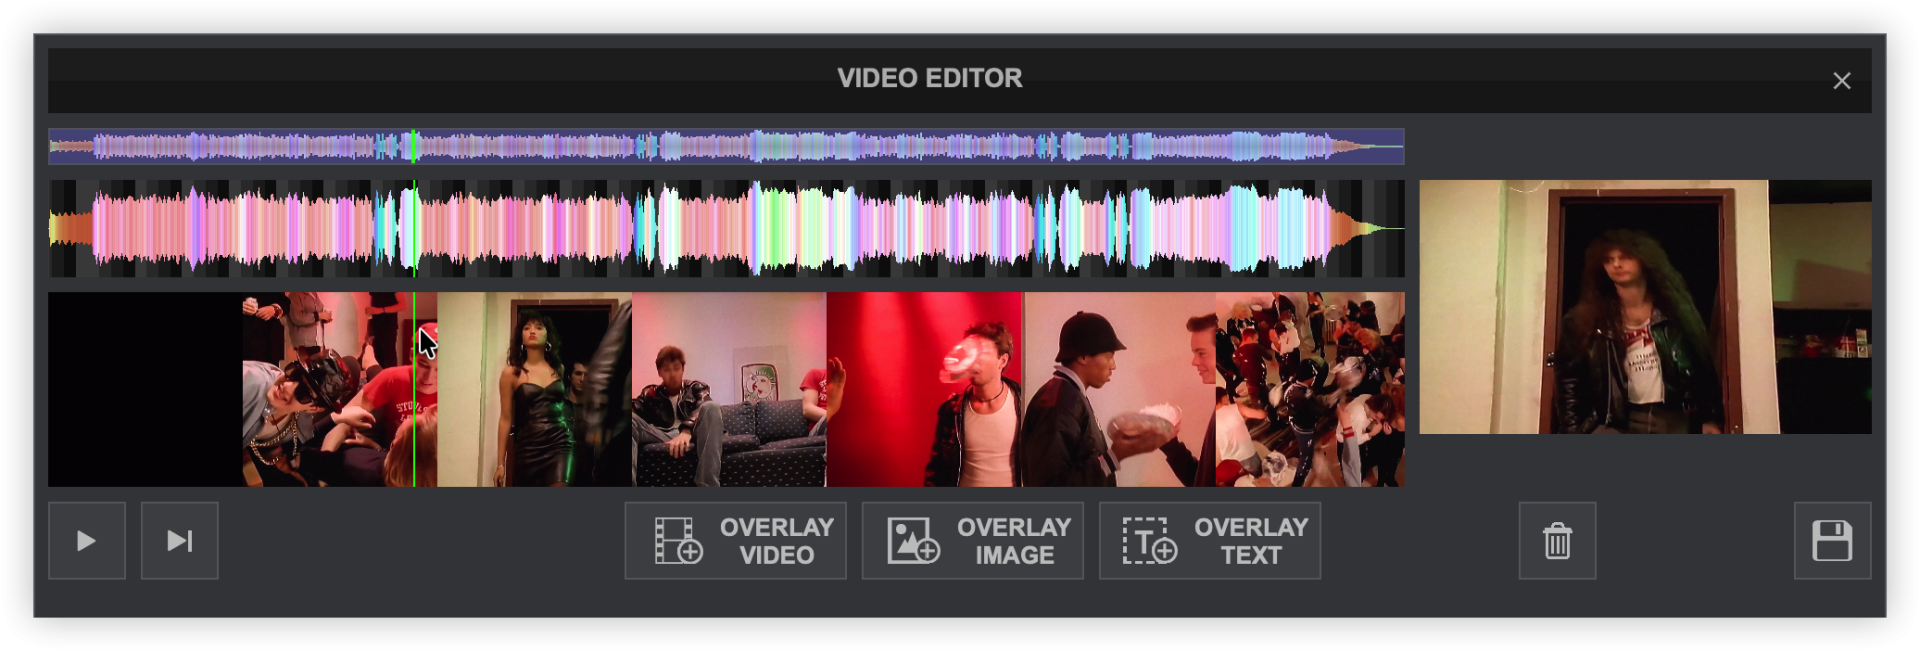
- SCROLL BAR. Displays the zoom level of the waveform and can be dragged to any part of the file to perform precise adjustments.
- WAVEFORM. Provides a visual display of the audio information. It displays the beatgrid using the grayscaled background and can be zoomed in to make precise BPM adjustments with a wheel mouse.
- VIDEO TIMELINE. Displays the entire video and overlays used in chronological order. If an audio file is being used, this area will remain blank until an overlay is dropped into position.
- PLAY/STOP. Will play the track if it is stopped and will stop the track if it’s playing.
- PLAY-HOLD. Plays the track as long as the button is held. Once released, the playhead will jump back to it’s previously stopped position.
- PLAYHEAD. Shows the current position of the track and is linear with the scroll bar, waveform and video timeline. All new adjustments and play functions use the playhead to determine the start position. It can be clicked and dragged to any part of the track with a mouse.
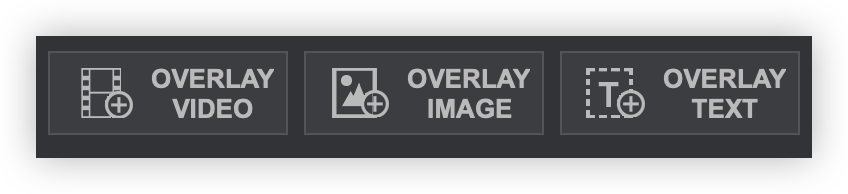
- OVERLAY BUTTONS
Used to create and insert the Video Overlay(s) into the Video Timeline based on the Playheads position. 
Used to create and insert the Image Overlay(s) into the Video Timeline based on the Playheads position. 
Used to create and insert the Text Overlay(s) into the Video Timeline based on the Playheads position. - VIDEO PREVIEW. Displays the video elements and overlays of the file being edited based on the position of the Playhead. Using Play-Stop or Play-Hold will preview the edits made in real time. If the video is not playing, the frame that the video is stopped on will be displayed (if available).
- DELETE. Deletes the selected (highlighted) edit.
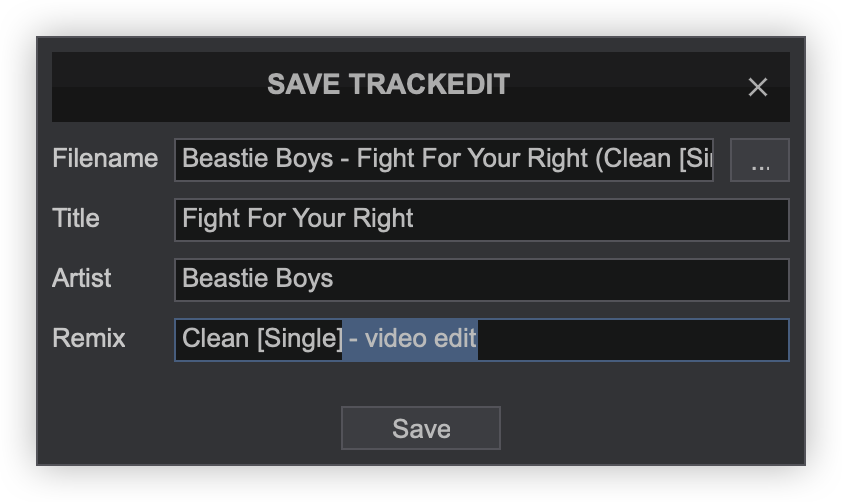
- SAVE. Creates a .vdjedit file in the same folder as the original track and a special icon will be applied to this file (see File Icons)
- OVERLAY EDITOR - This area will populate with an editable area for the desired Overlay once selected (Overlay Text displayed in image).
HOW TO
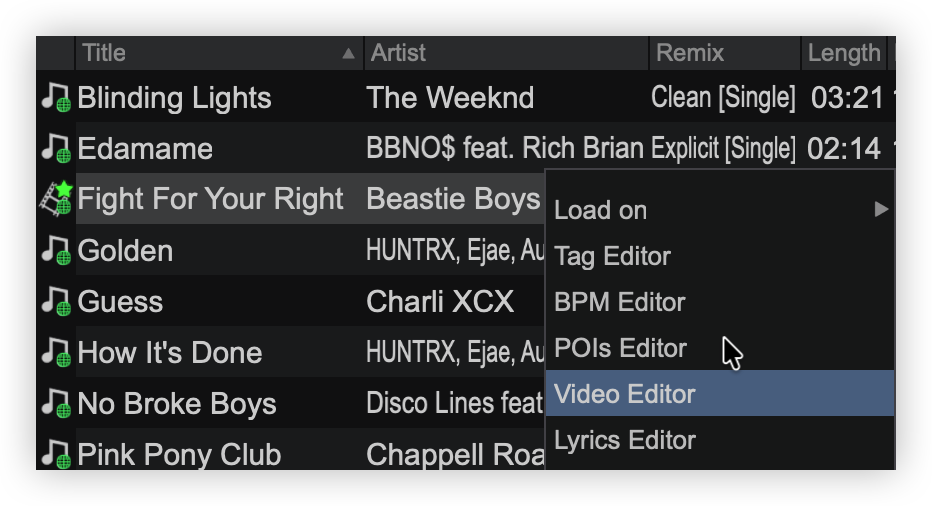
- From the file list, right-click on the file to be edited and select Video Editor from the option menu that appears.
- Once the Video Editor is opened, the multi-colored waveform will be displayed providing the tracks audio information. If the track is Audio only, the Video Timeline and Video Preview will be empty. If the track is a Video file, the Video Timeline will display the entire video and the Video Preview will be stopped on the first frame.
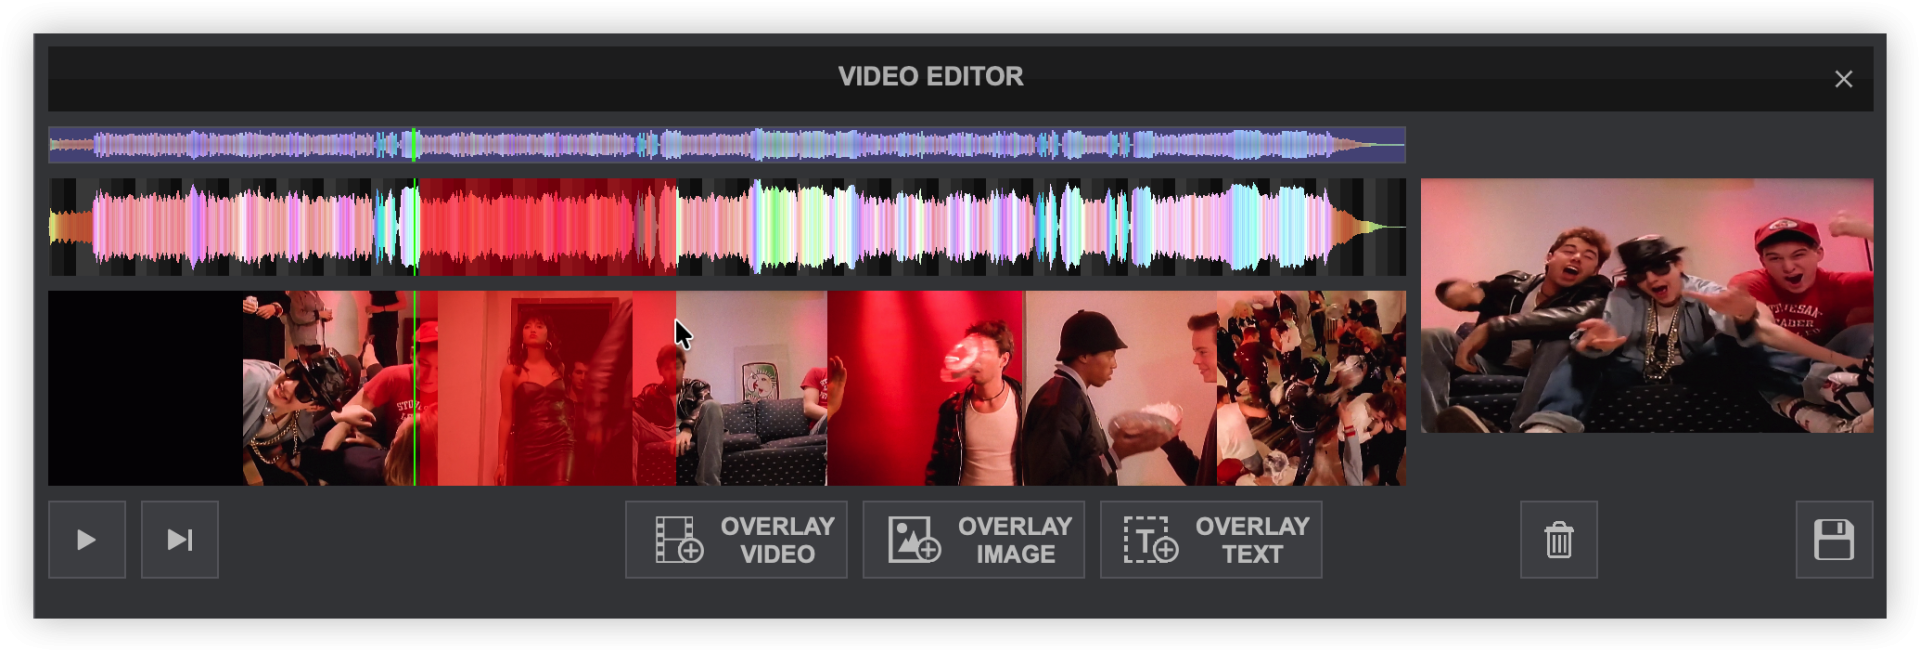
- Position the Playhead to the desired position using the play buttons or by dragging it into place. Use a wheel mouse to zoom in and out and the scroll bar to move back and forth to the areas that require a precise edit.
- Alternatively, clicking on any area besides the Playhead in the Video Timeline will create an editable field (red area) that can be adjusted with a mouse.
- OVERLAY
- OVERLAY VIDEO
Click on the OVERLAY VIDEO button to place the overlay at the beginning of the playhead or in the red highlighted area of the Video Timeline. This will open the computer's file library to select the video to be overlayed.
Once the file is selected it will be imported to both the Video Timeline and the Overlay Editor. If a designated section is created (red area) in the Video Timeline, the selected clip will only be added to that area.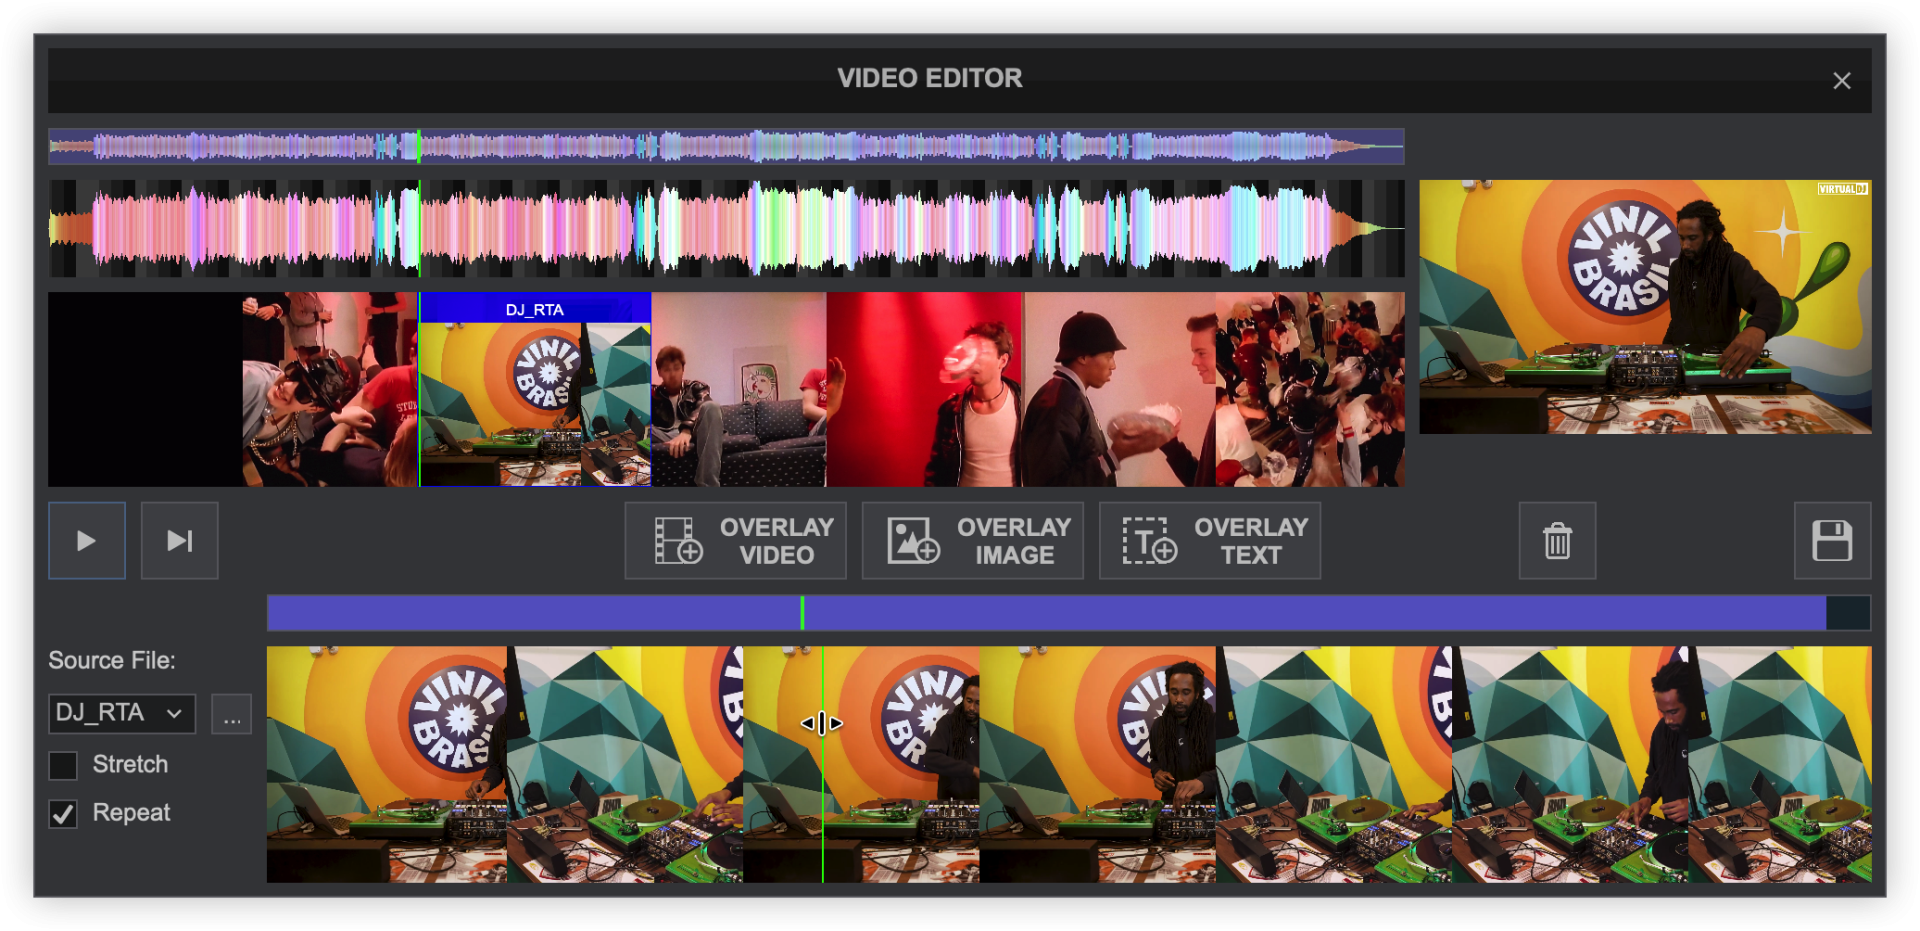
Grab the ends of the clip to resize the Video Overlay and/or grab the entire clip to reposition it with the mouse pointer.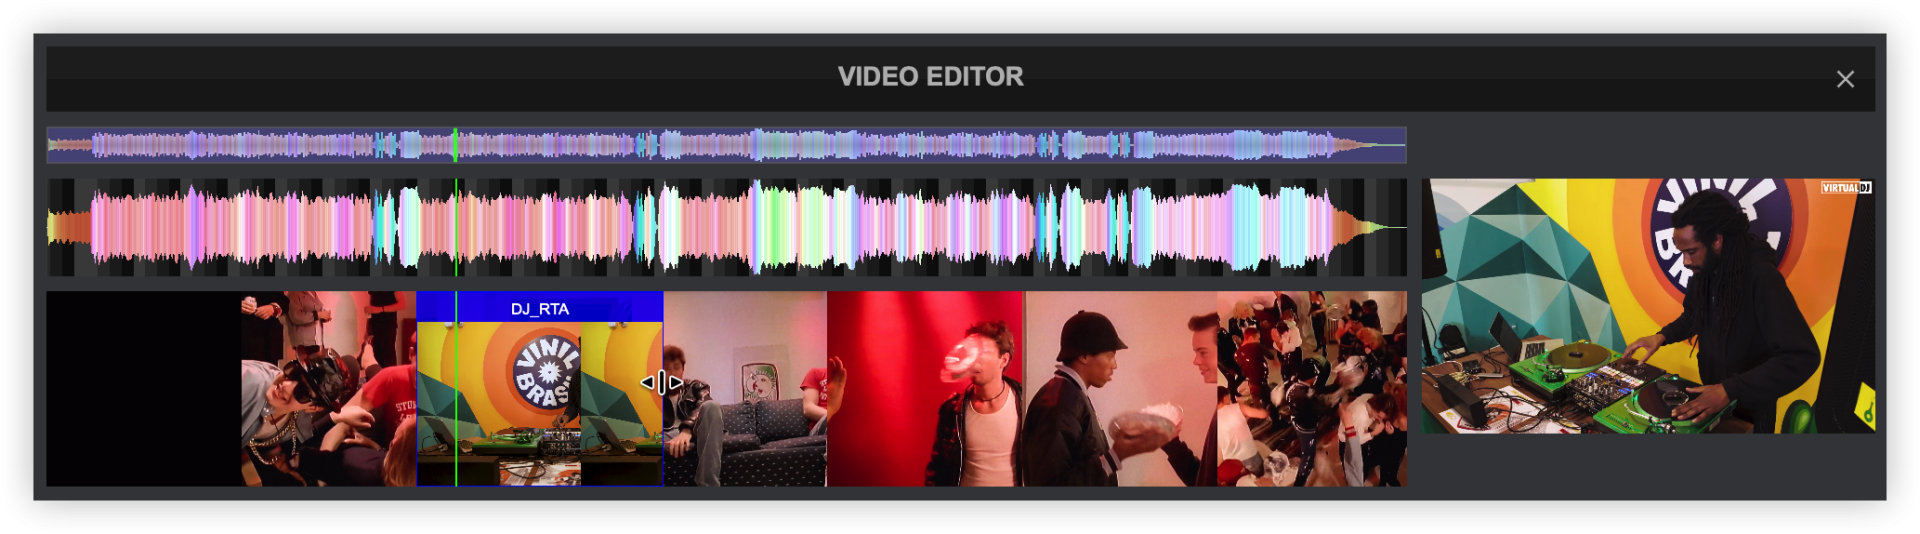
In the Overlay Editor, highlight the section of the clip to be used in the Video Timeline by grabbing the ends of the clip and dragging them to resize and reposition the portion of the clip to be used. Click on Stretch and/or Repeat if the selected area is larger than the video clip being used as the overlay.
To add the same clip to another area of the timeline, reposition the playhead and click on the OVERLAY VIDEO button once again.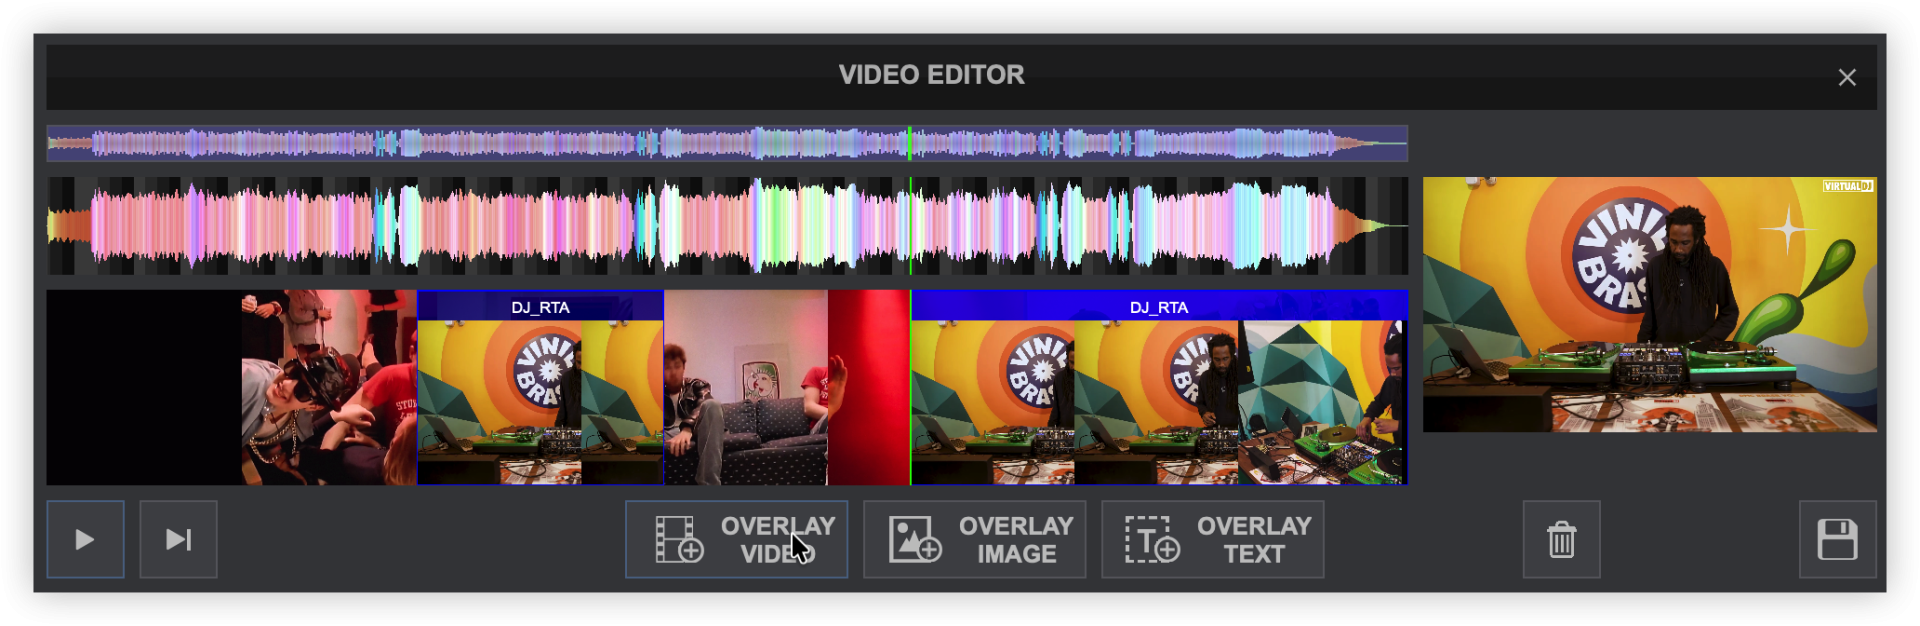
- OVERLAY IMAGE
Click on the OVERLAY IMAGE button to place the overlay at the beginning of the playhead or in the red highlighted area of the Video Timeline. This will open the computer's file library to select the image to be overlayed.
Once the Image is placed in the Video Timeline, grab the ends of the image to resize the Image Overlay and/or grab the entire image to reposition it with the mouse pointer until it is in the desired position.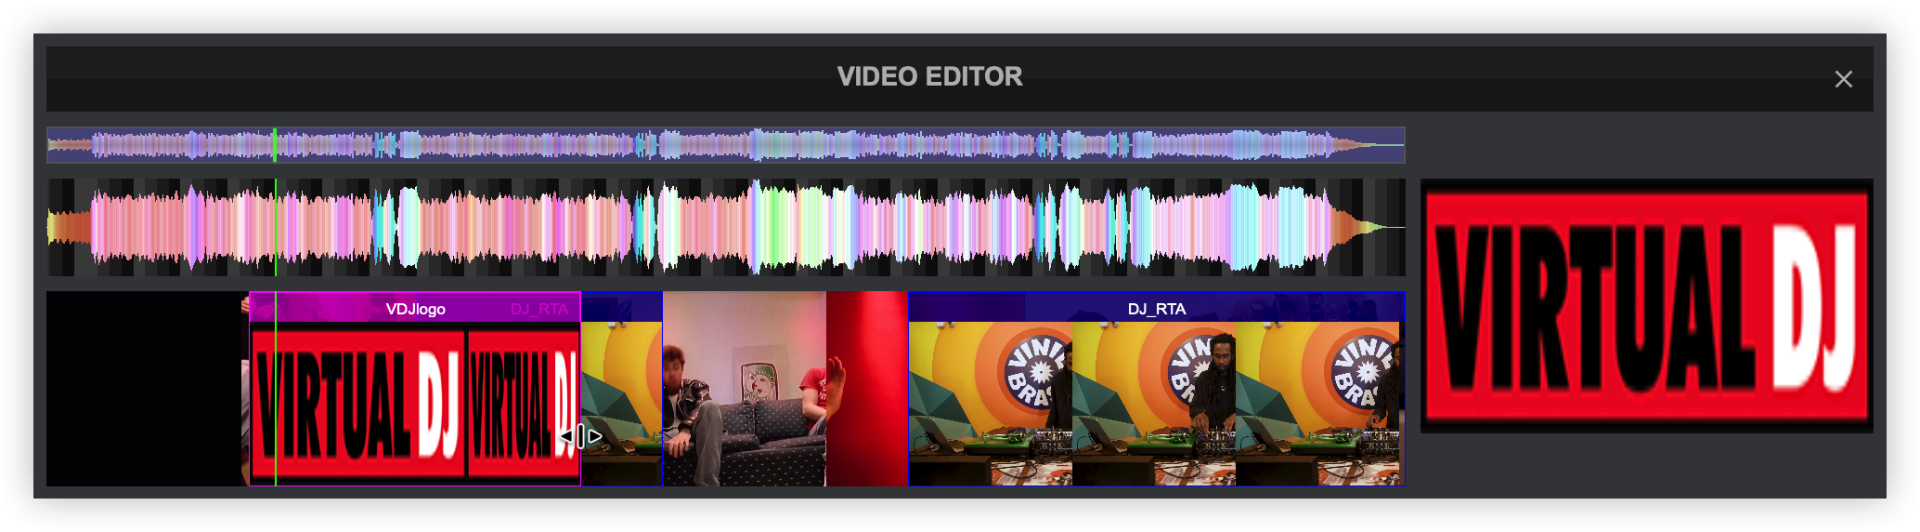
- OVERLAY TEXT
Click on the OVERLAY TEXT button to place the overlay at the beginning of the playhead or in the red highlighted area of the Video Timeline.
Go to the Overlay Editor and select the ‘text overlays’ tab (if not selected). Enter the text to be displayed in the text box on the left. On the right, choose the font and color of the displayed text as well as add borders and/or shadows if desired.
Additional text effects can also be selected in order to add an animated effect to the text that will be displayed on the screen. 
In the Video Timeline, grab the ends of the clip to resize the Text Overlay and/or grab the entire clip to re-position it with the mouse pointer until it is in the desired position.
Use the Video Preview window to grab the edges of the text box to resize the text and/or grab the entire text box to reposition it. 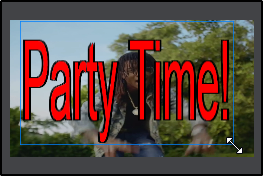
- Multiple Video, Text, and Image Overlays can be added to the same track. If an error is made or the results of the Overlay are not as planned, highlight the selected Overlay in the Video Timeline and click on the delete button to remove it.