- Guía Rápida
- Carátula
- Sección Superior
- Decks
- Mixer
- Navegador
- Base de Datos
- Separación de Pistas (Stems) 2.0
- Editores
- Configuración
- Control Remoto de VirtualDJ
- Apendice


Manual del Usuario
Controladores
VirtualDJ comes with predefined mappings for most of the MIDI/HID DJ Controllers on the market. Mappings can be easily changed and tweaked to preference. Controllers are available only if a Pro Full Infinity, Pro Monthly subscription, or a controller specific license is available (See Licenses), otherwise the controller will work only for the first 10 minutes of use when the software is initially launched.
To check if your controller is natively supported please see Supported MIDI and HID Controllers in VirtualDJ

- KEYBOARD - By default, the computer keyboard is already mapped. It is displayed with all the key functions. In 2 Deck mode blue keys control the left deck, while red keys control the right deck. If in 4 deck mode the addition of green and orange are added to differentiate the difference between decks. Keys that have no color code are global and control universal functions such as the crossfader.
Clicking on a key will bring up the simple Mapping editor which provides the ability to change the function of that specific key.
The Editor displays the Key combination at the top, current Mapping (Action), as well as displays a list of categories and actions that can be clicked on for quick Mapping . Clicking on the Save button will save any changes to the Mapping . A Documentation Button is also included to learn more about script actions.
- EXTERNAL CONTROLLER(S) - Each external controller connected to the computer will have it's own tab which provides quick setup and documentation links.

Clicking on Setup & Drivers will open a browser tab to the online manual setup page for that particular device. 
Clicking on Controls will open a browser tab to the online manual controls page for that particular device. 
Displays the current EQ setting for the device. Clicking on the EQ mode will open the Hardware EQ Mode in the software. 
Clicking on Edit Mapping will open the advanced editor for the selected device. 
Clicking on the gear icon will open the Options menu with specific settings for the selected device. 
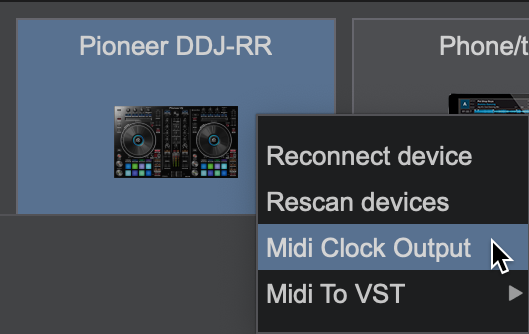
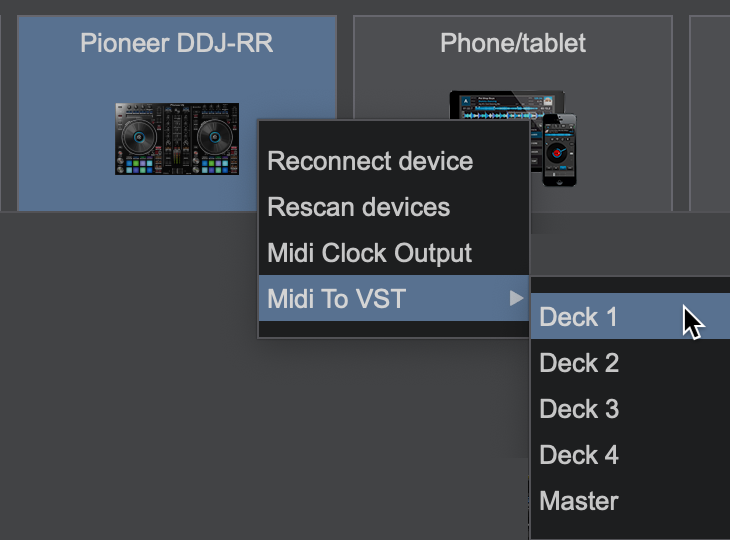
The connection icon provides the status of the device. When the controller is fully connected the icon will display in green. Clicking on the icon will provide options to reconnect devices, rescan for devices, and offer the ability for Midi Clock Output and/or Midi to VST. - PHONE/TABLET - Used to connect the VirtualDJ Remote Application to the software.
- MISSING CONTROLLER? - This section is used to rescan for devices, list all compatible devices, and displays advanced features with connected devices. Clicking on a listed device in the menu will provide setup and documentation (if available), as well as the ability to edit the Mapping of the device.
- KEYBOARD MAPPER OPTIONS - The dropdown menu provides the ability to change the keyboard mapper. There are 4 included mappers to chose from: Default, Default (Legacy), Default (Rekordbox compatible), and Default (Serato compatible). An Ignore option is also provided in order to disable the keyboard from using shortcuts if desired.
- ADVANCED EDITOR - Opens the keyboard's advanced Mapping editor. This is identical to the Edit Mapping feature for controllers with the exception of Deck Assignment and MIDI Activity.
EDIT Mapping
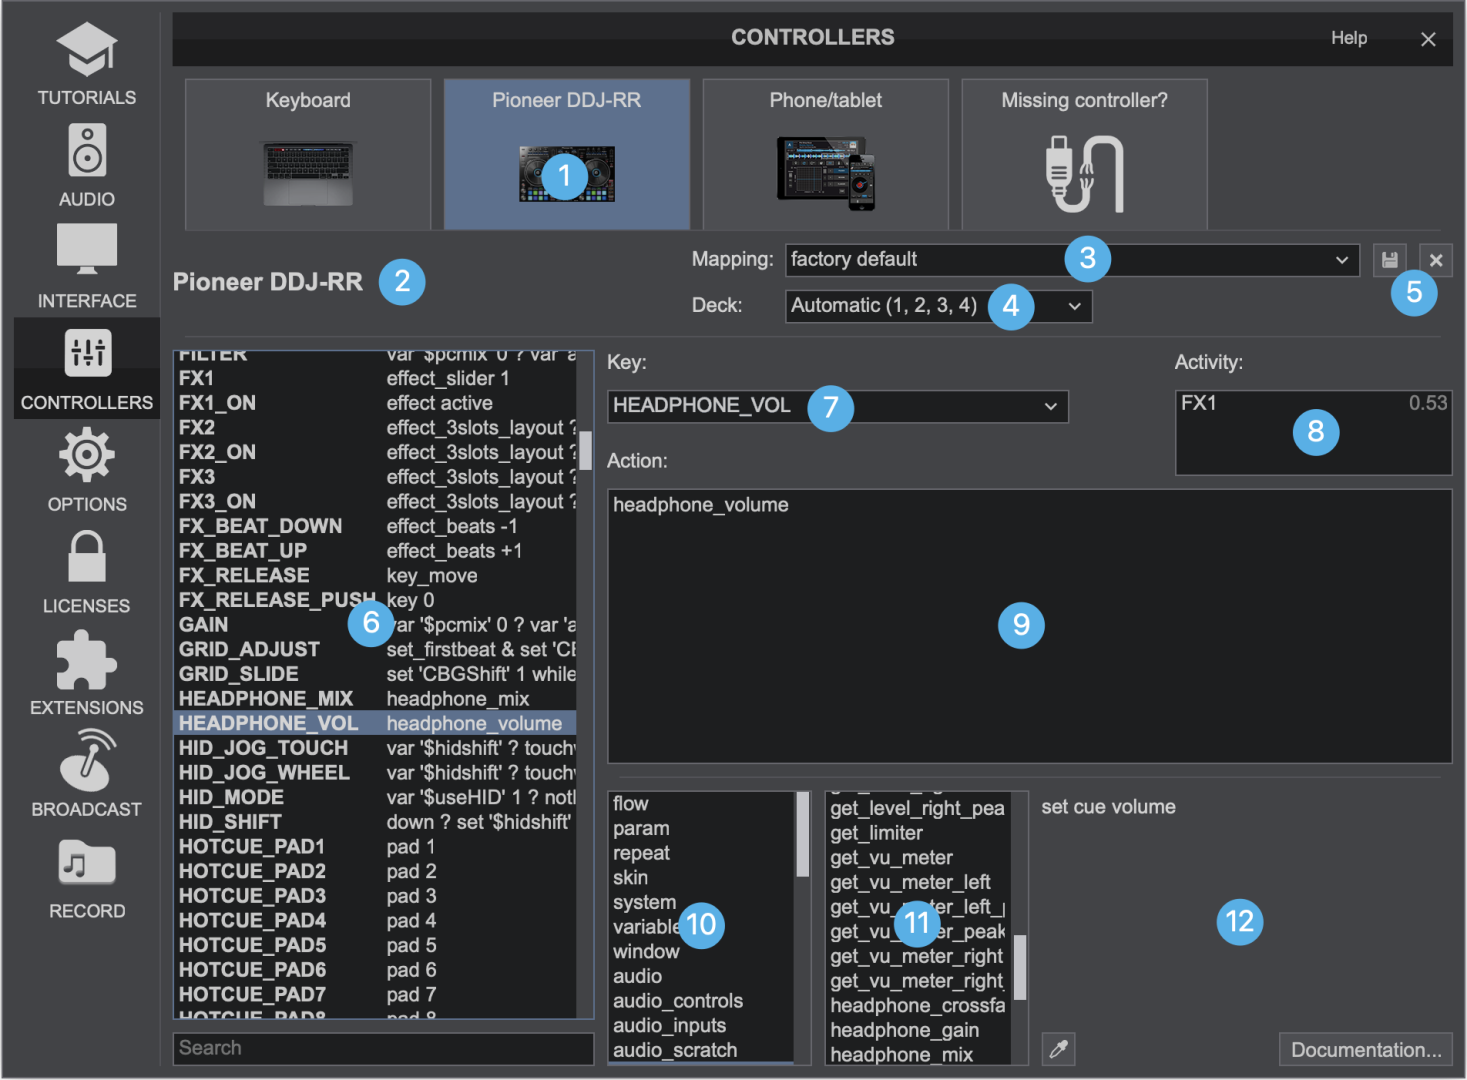
- DEVICE TAB - Displays the name and thumbnail of the current selected device.
- DEVICE NAME - Provides the name of the current selected device.
- Mapping LIST - Each connected device offers Factory default Mapping and Ignore in the Mapping Dropdown. Set a device to Ignore in order to use it with a different application while running VirtualDJ at the same time. If a Custom Mapping is available, it can also be selected.
- DECK ASSIGNMENT - Assigns the decks to be controlled by the connected device. Automatic is the default which allows VirtualDJ to assign the decks automatically as it is the most common.
- SAVE/DELETE - Save and Delete buttons are available to the left of the Mapping dropdown to save and delete altered or custom mappings.
- KEY LIST - All mapped keys and their assigned actions are displayed. Clicking on a key in the list will populate the KEY field and show it's mapped action in the ACTION field.
- KEY - Displays the current selected key from the KEY LIST or can be selected from the dropdown menu.
- MIDI ACTIVITY - Any button, dial or slider touched on the controller will appear in this window. Clicking on it will populate the KEY field.
- ACTION - Displays the current action mapped to the key and can be edited.
- CATEGORY SELECT - Displays commonly used categories to assist with scripts and populates the ACTION SELECT window based on the category selected.
- ACTION SELECT - Displays commonly used scripts based on the category selected. Clicking on a script will add it to the KEY chosen for easy custom Mapping .
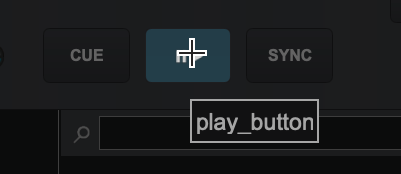
- DESCRIPTION - Provides a description of the current script. Additionally, there is a Mapping tool (eye dropper) to the lower left of the box to easily pick out skin elements that a button could be mapped to, and automatically Mapping the button with a few mouse clicks. To the lower right is a Documentation... button that will open a web browser and provide more details about VirtualDJ script actions and syntax.
CUSTOM Mapping


Clicking on the action will automatically add it to the script to make the Mapping process more convenient.
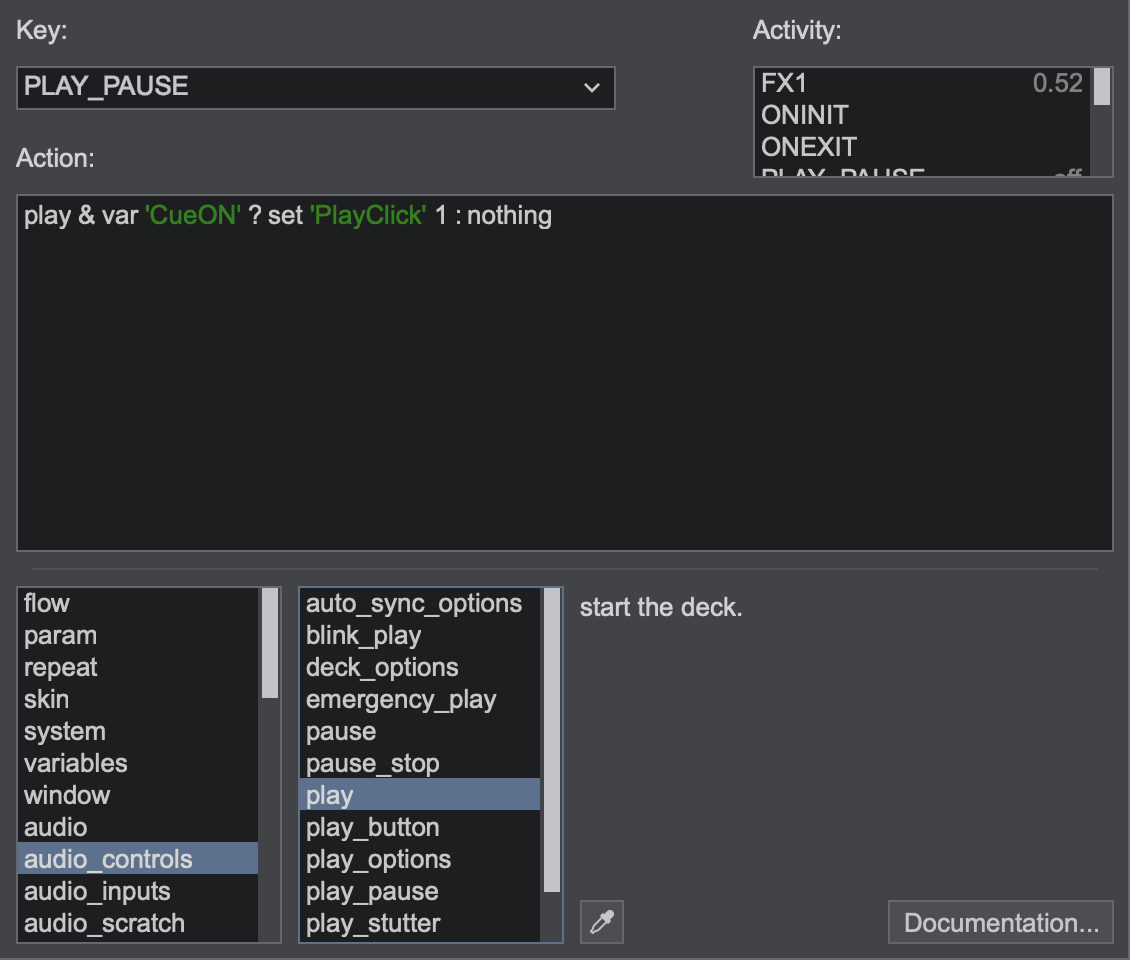

Mapping file.

MIDI CLOCK OUTPUT
Any defined Midi device can be used and will send VirtualDJ's current Master tempo to the other application.
The other application will need to be configured to accept a Midi Clock Input in order for the information to be passed through to it. Please consult the documentation of the software that you wish to send VirtualDJ's Midi Clock to in order to configure it properly.
MIDI TO VST
This setup is pass through. Mapping for the device is handled by the selected VST (if offered).
map, Mapping , mapper, remap, controller, keyboard, midi, hid